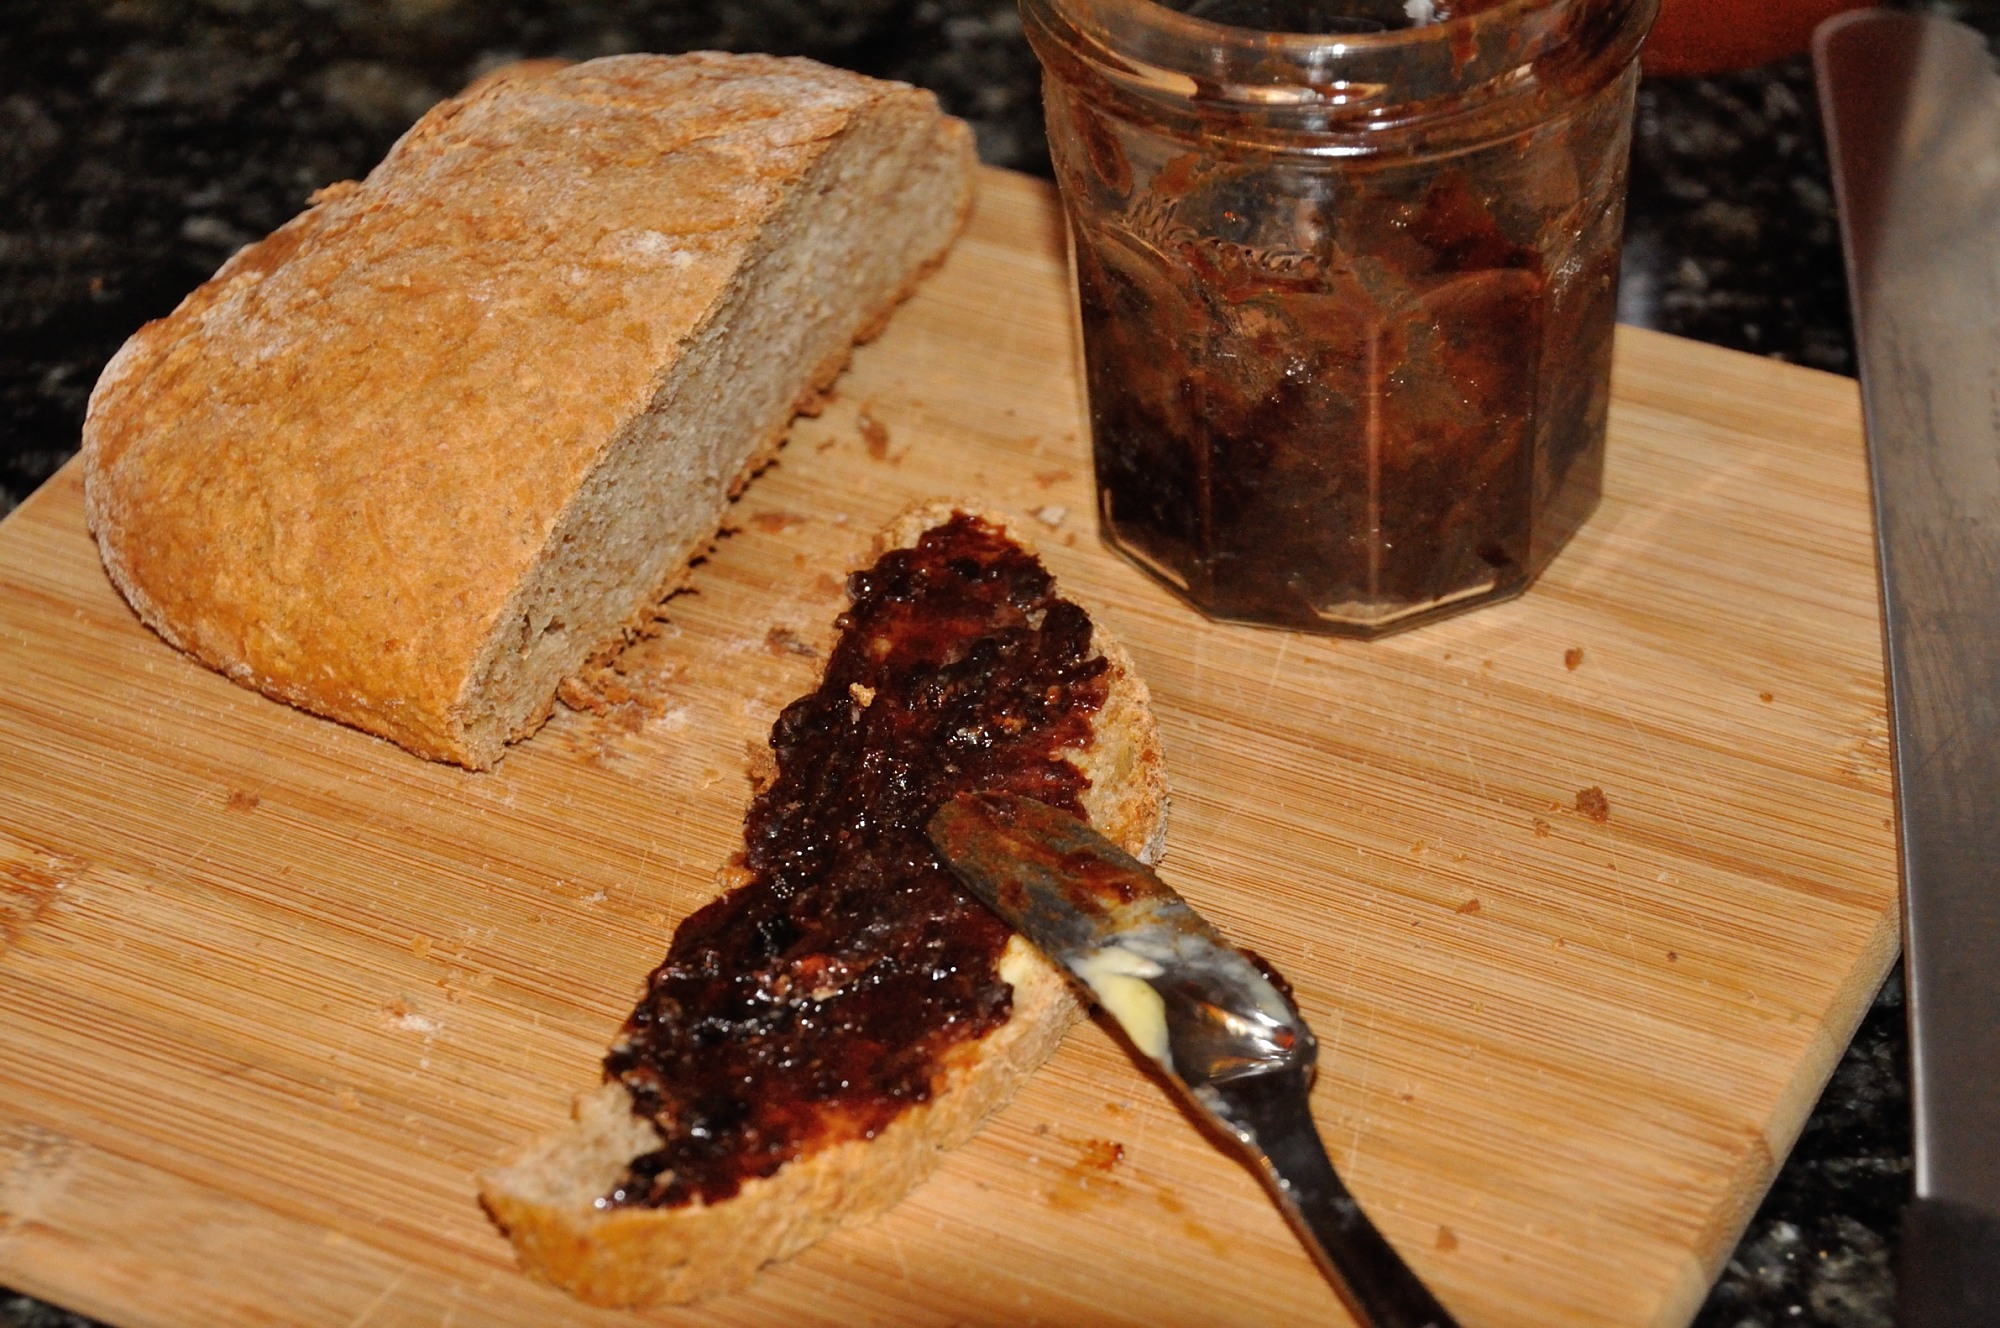
Baked Plum Jam (Pečený Slivkový Lekvár)
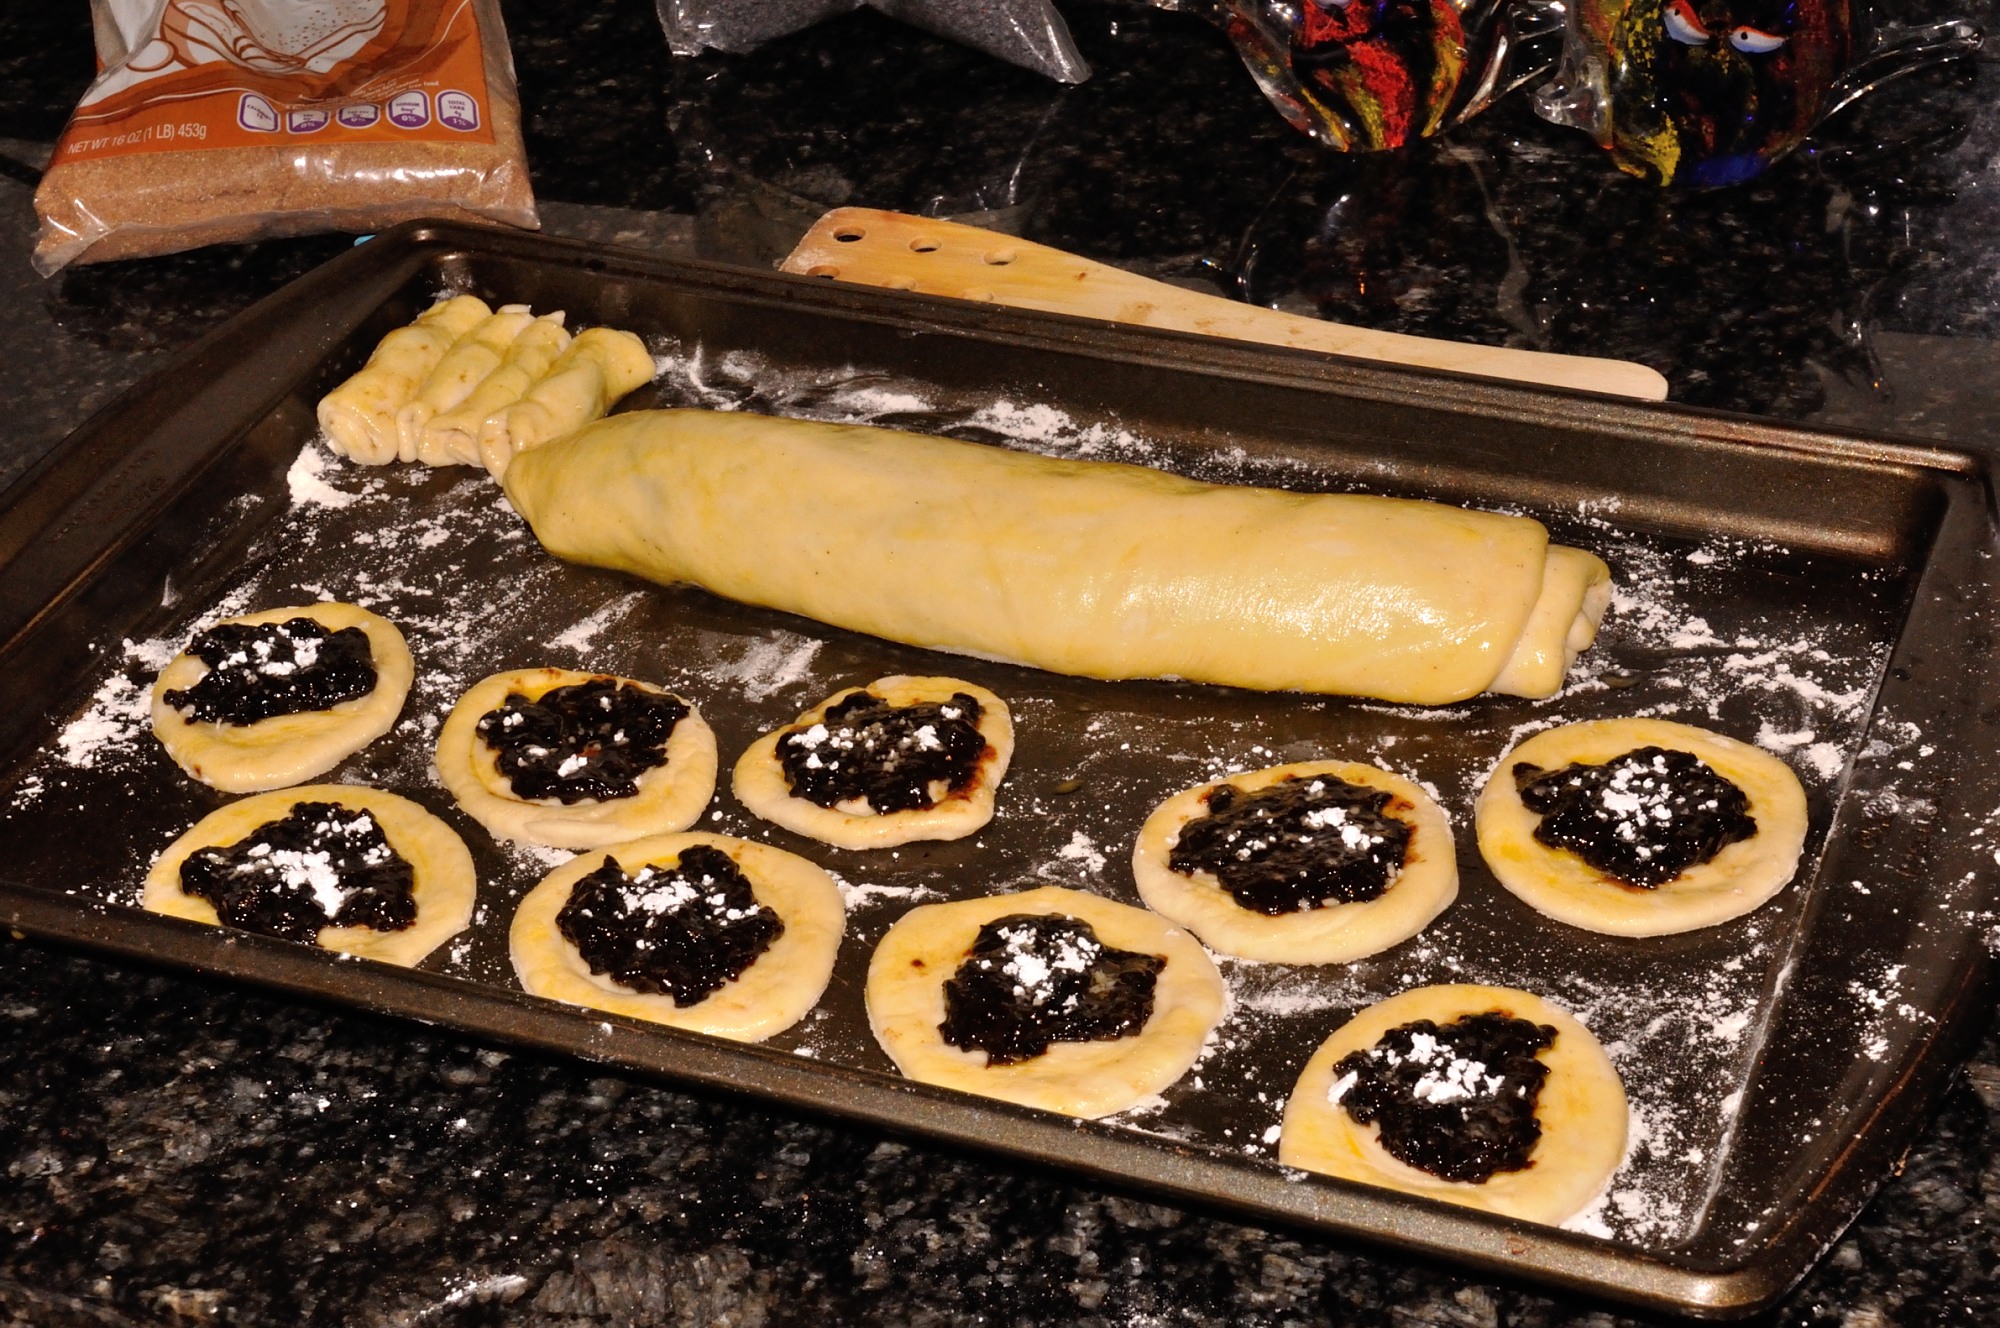
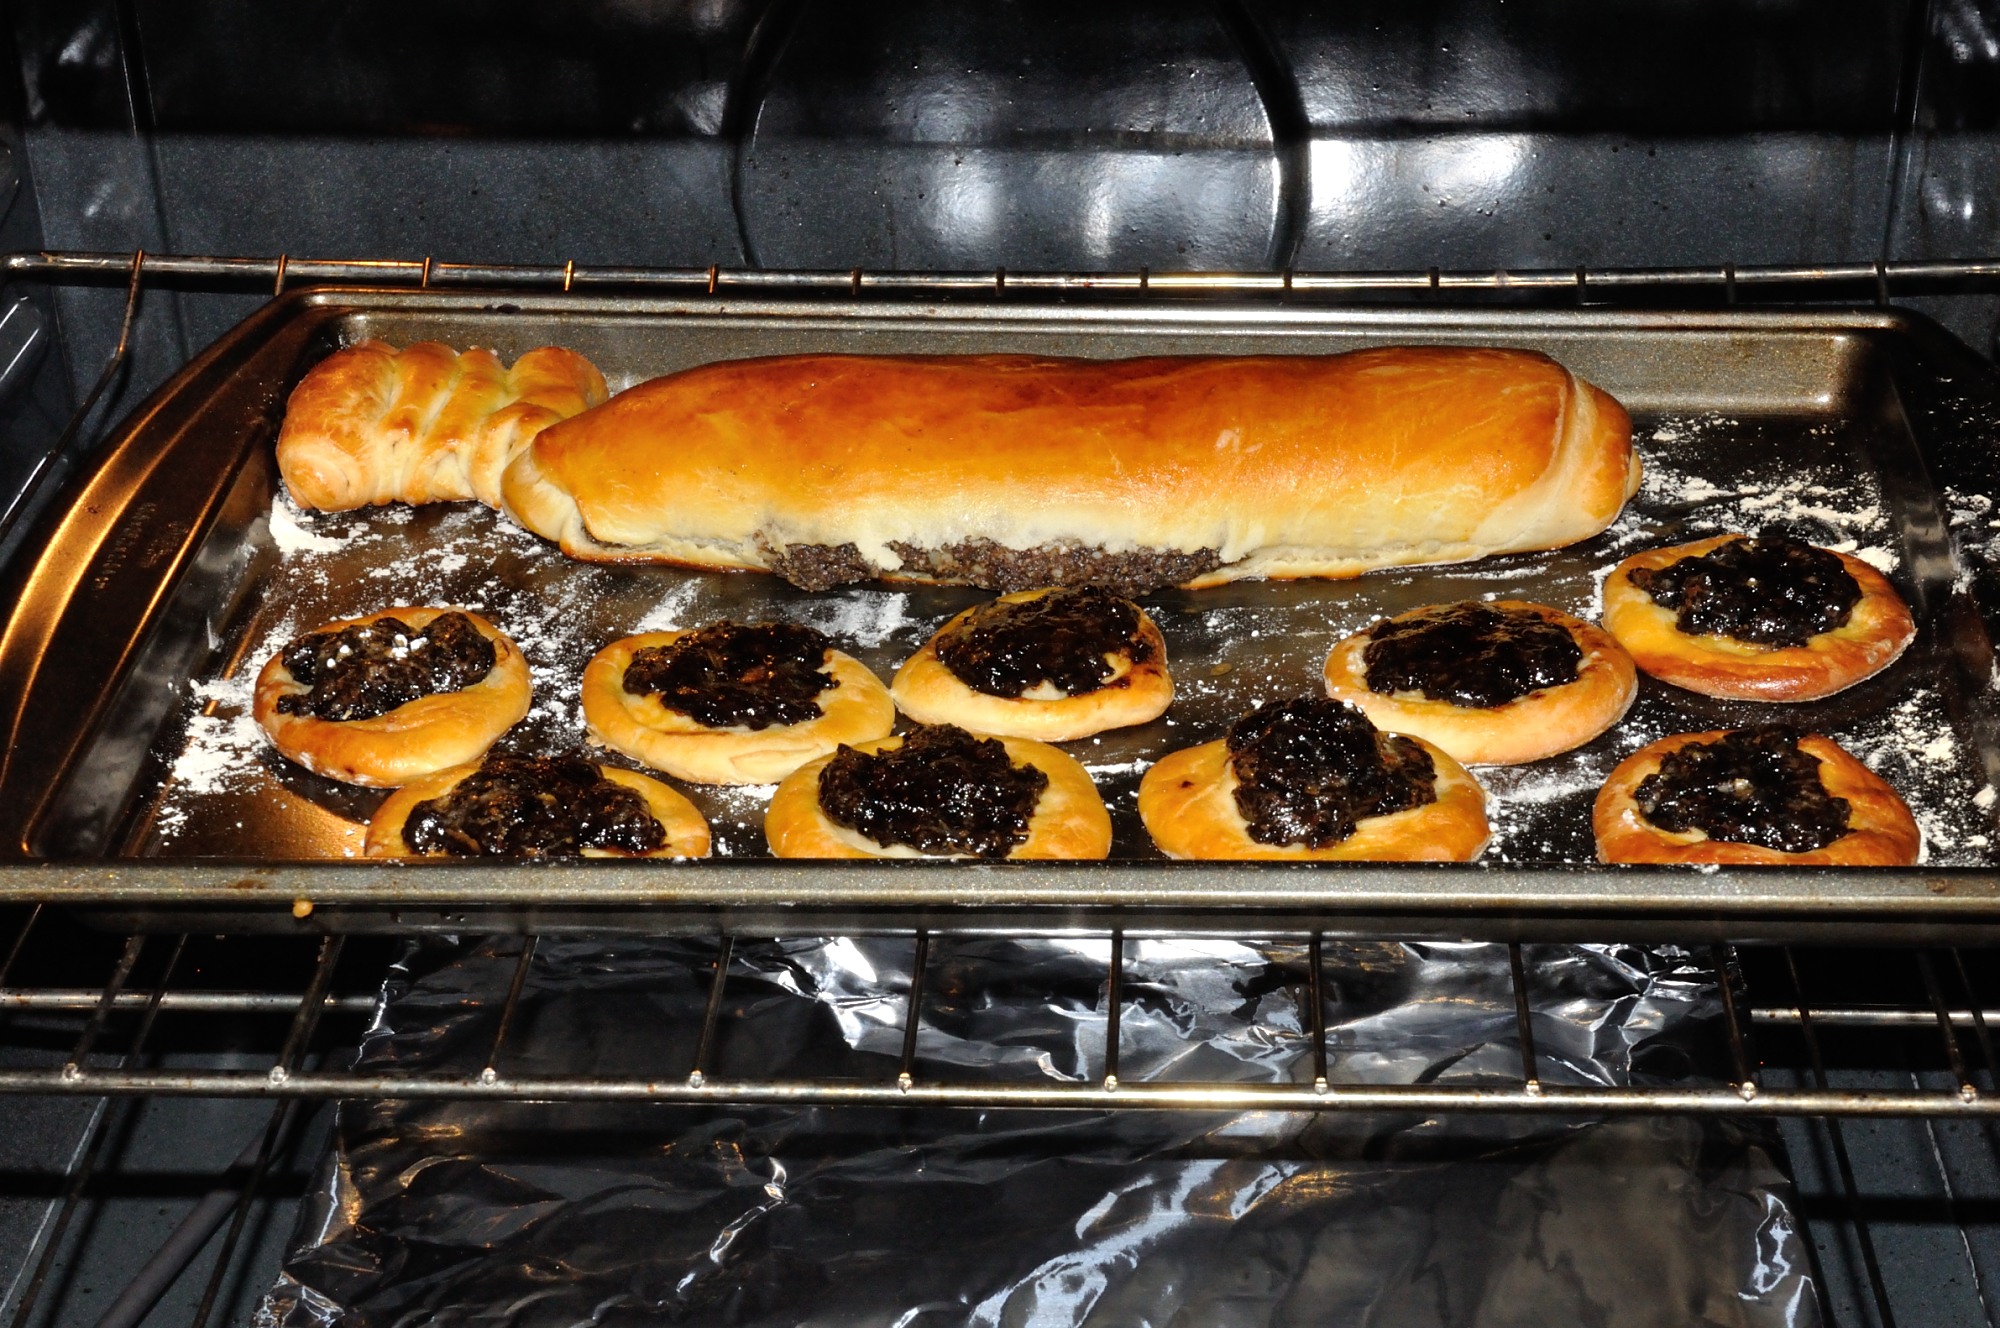
If you are a frequent visitor to this cooking site, you have surely come across multiple posts in which I am grumbling about the difficulty of finding plum jam in the United States. Plum jam (slivkový lekvár) is an essential ingredient in Slovak cuisine. It’s thick and does not run, which makes it the ideal filling for koláče, buchty, sweet pierogi, or jam turnovers. There is also a popular dish made with whole plumes, plum dumplings.
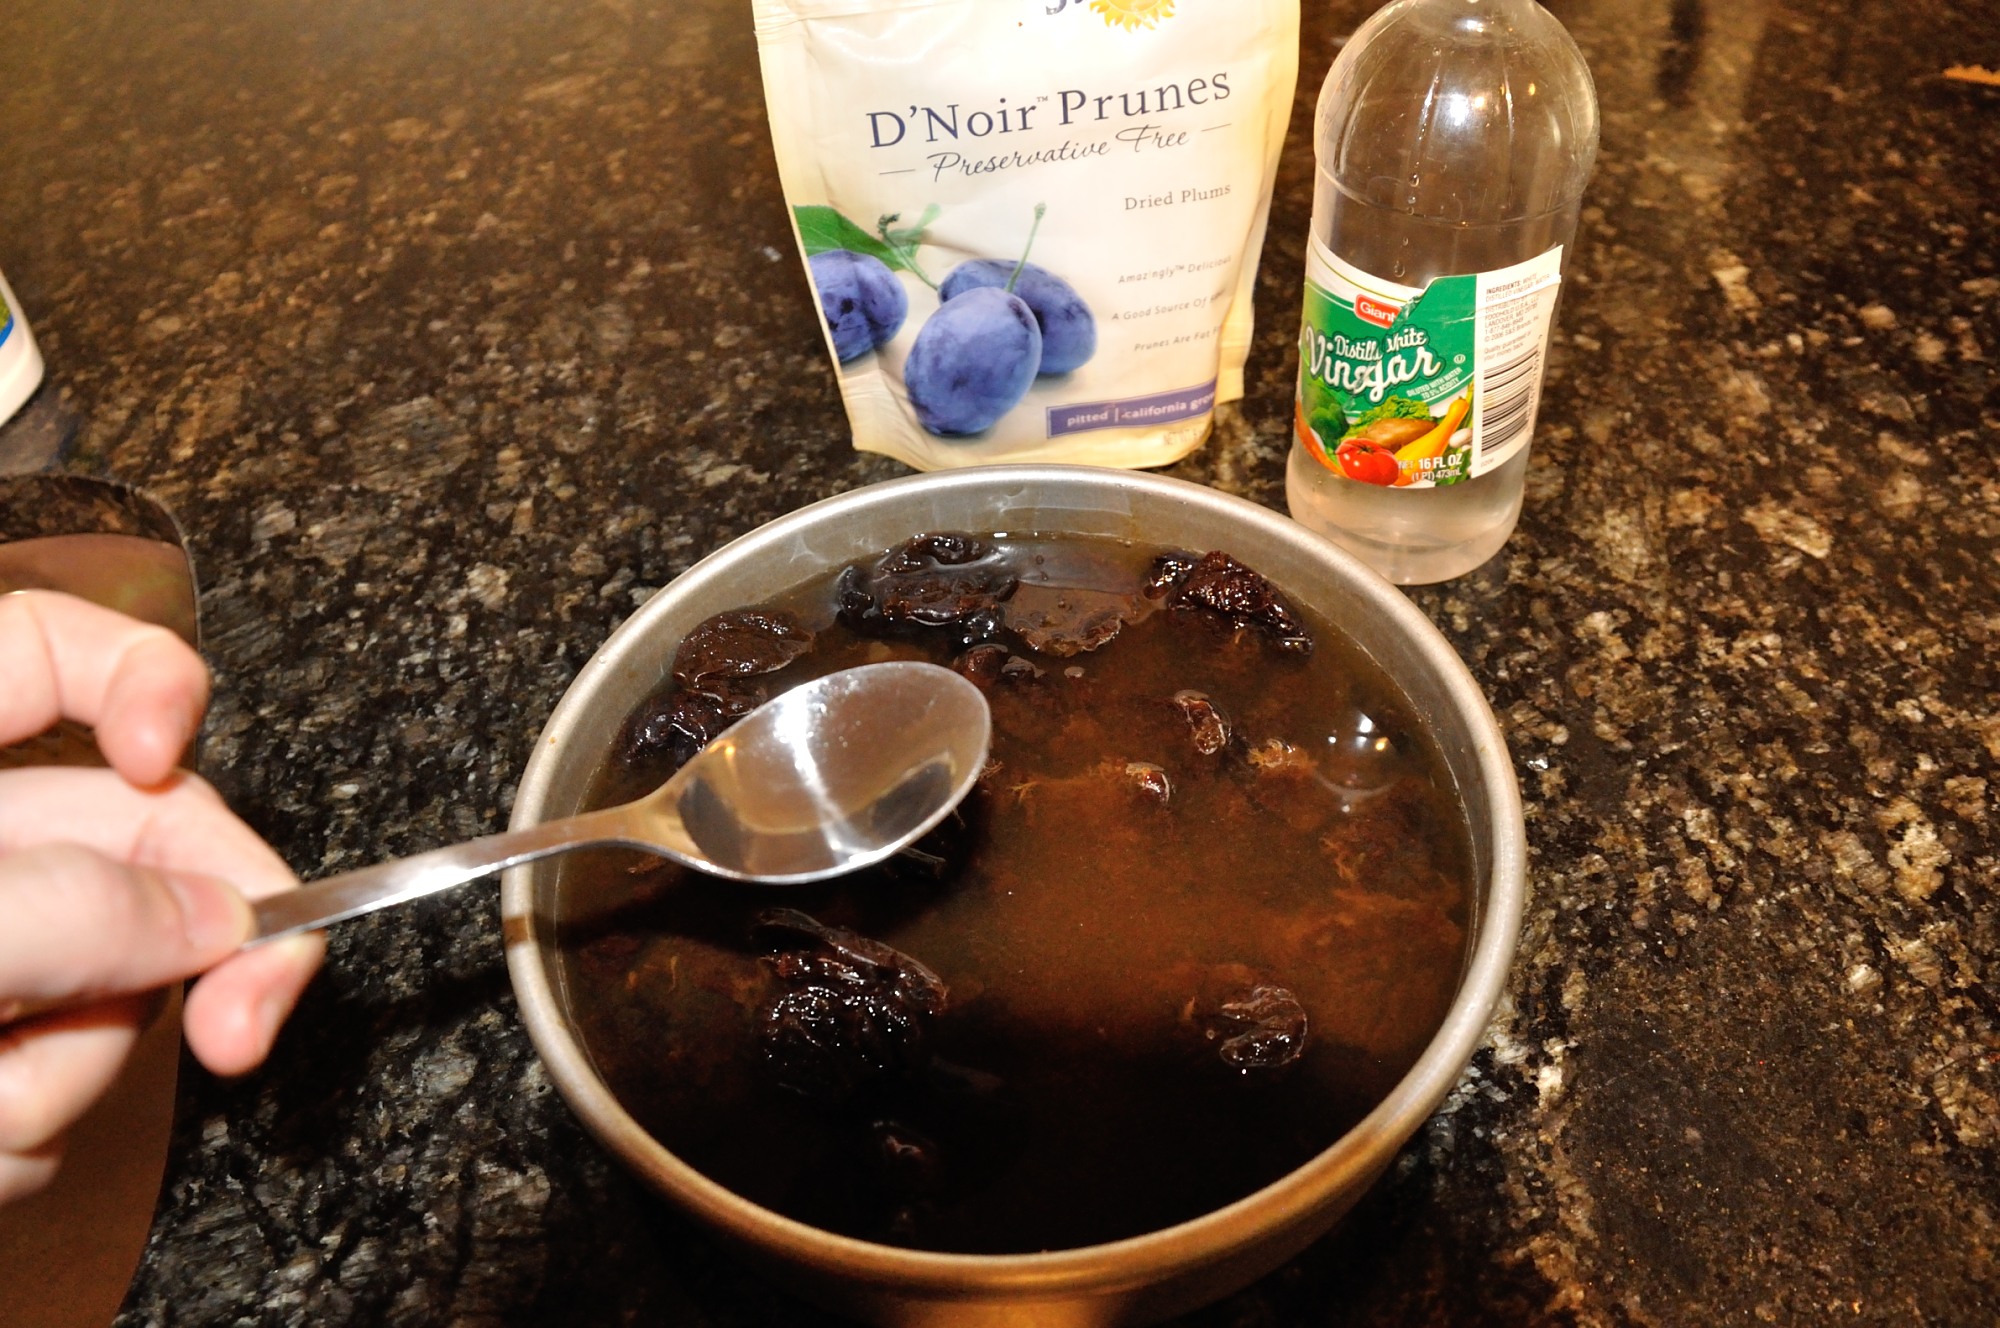
Long story short, I decided try making my own plum jam. The difficulty is that I couldn’t actually find fresh plums. I started this project in December, long after the plum season ended. On top of that, the plums that can be found in my local grocery stores are the big red kinds, not the small blue Damson plums used in Slovakia. However, I noticed that the plums on the cover photo of the package of D’Noir prunes looked very much right! So I figured, perhaps I could try making jam from prunes – which are basically just dehydrated plums. The end result was quite satisfactory, although the color of the jam ended up more brown than blue. Below you will find the recipe. As you will see, making your own plum jam is actually quite easy.
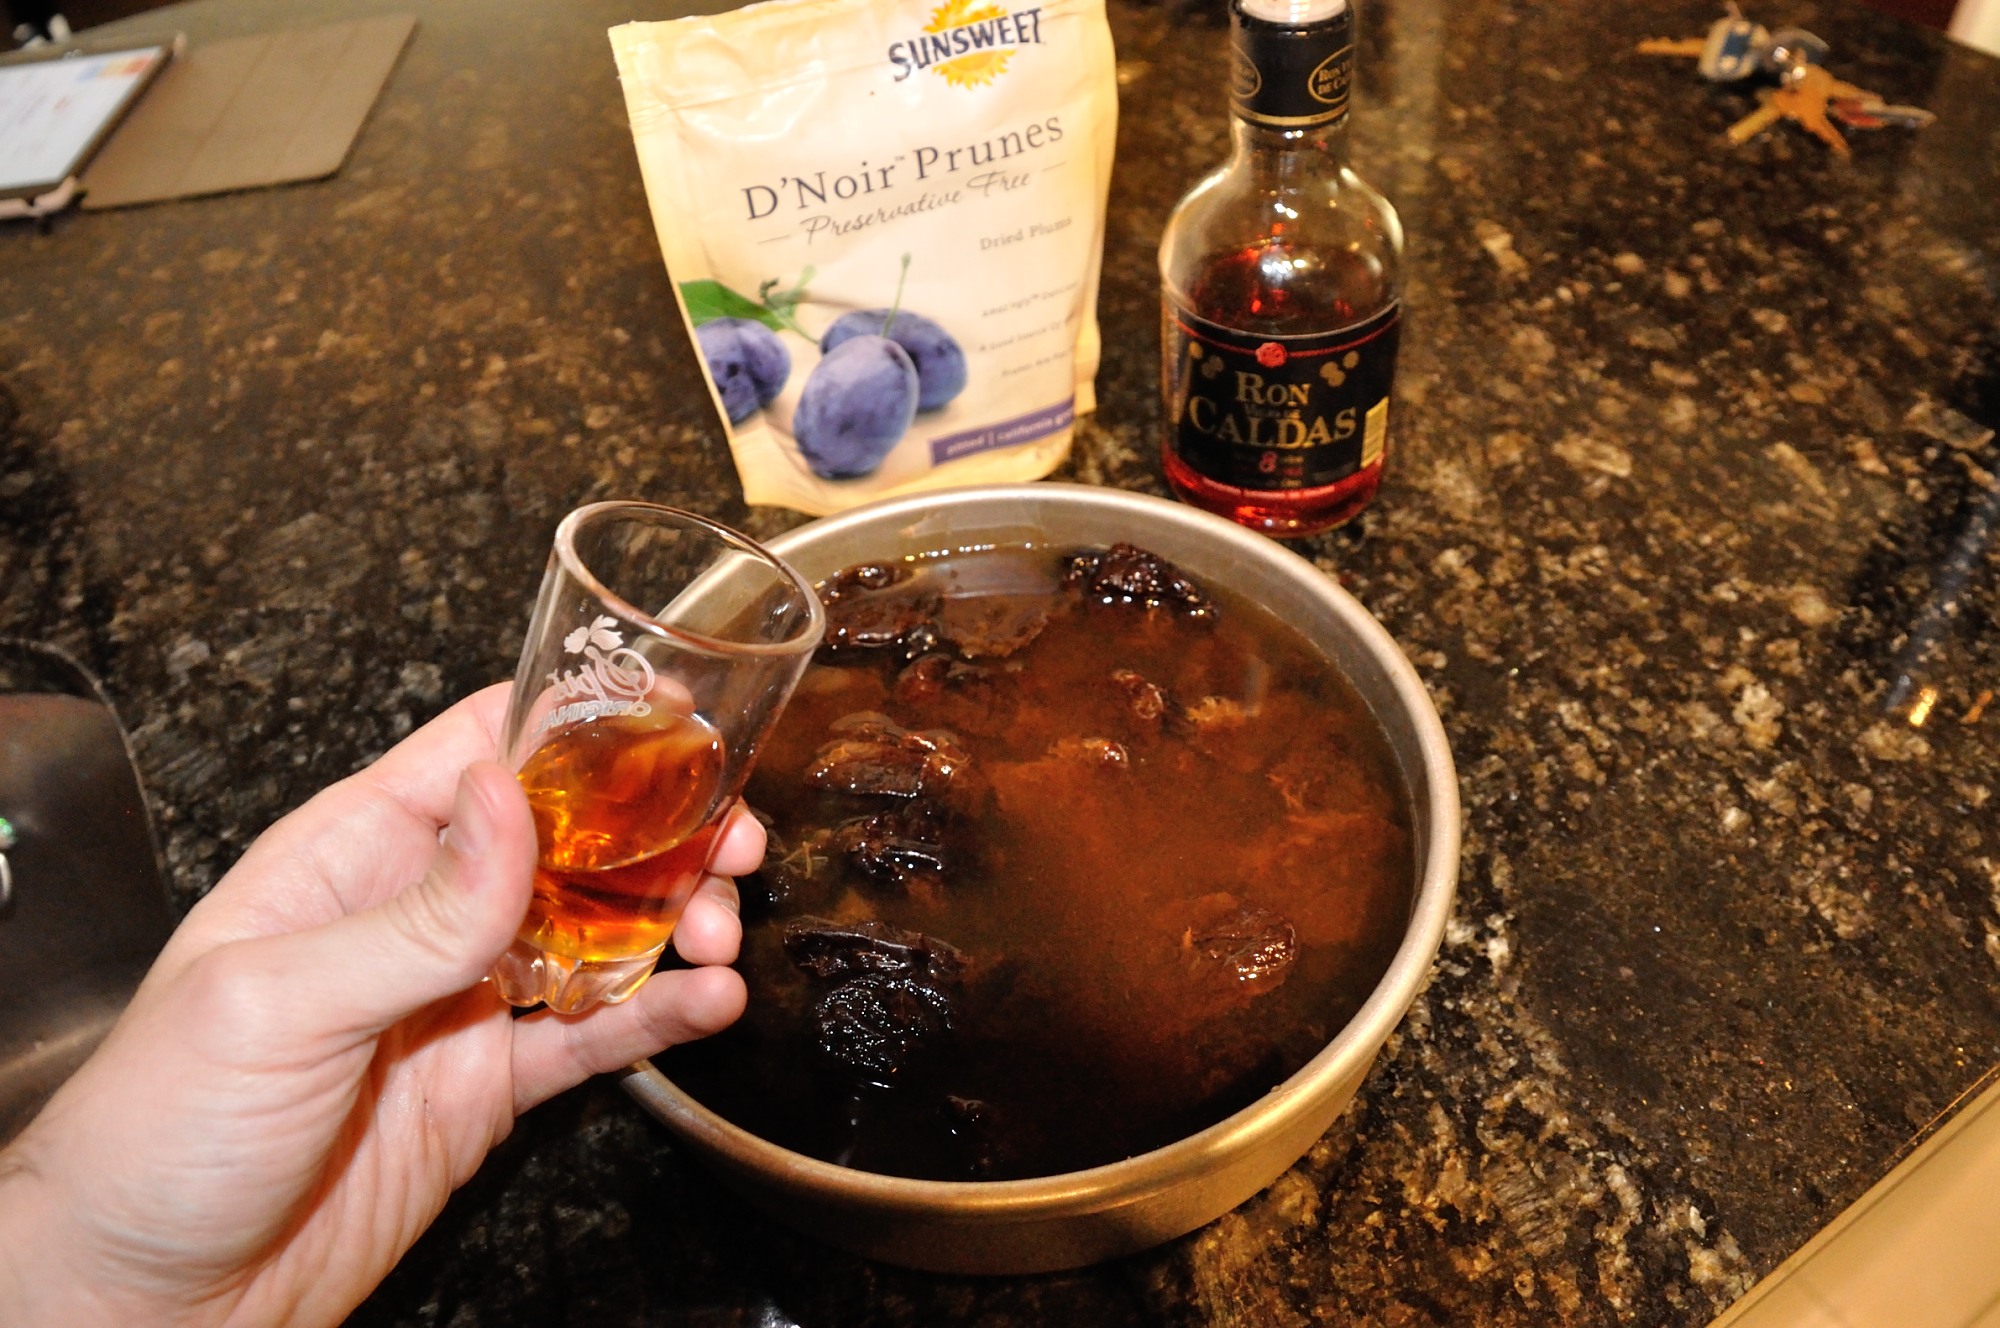
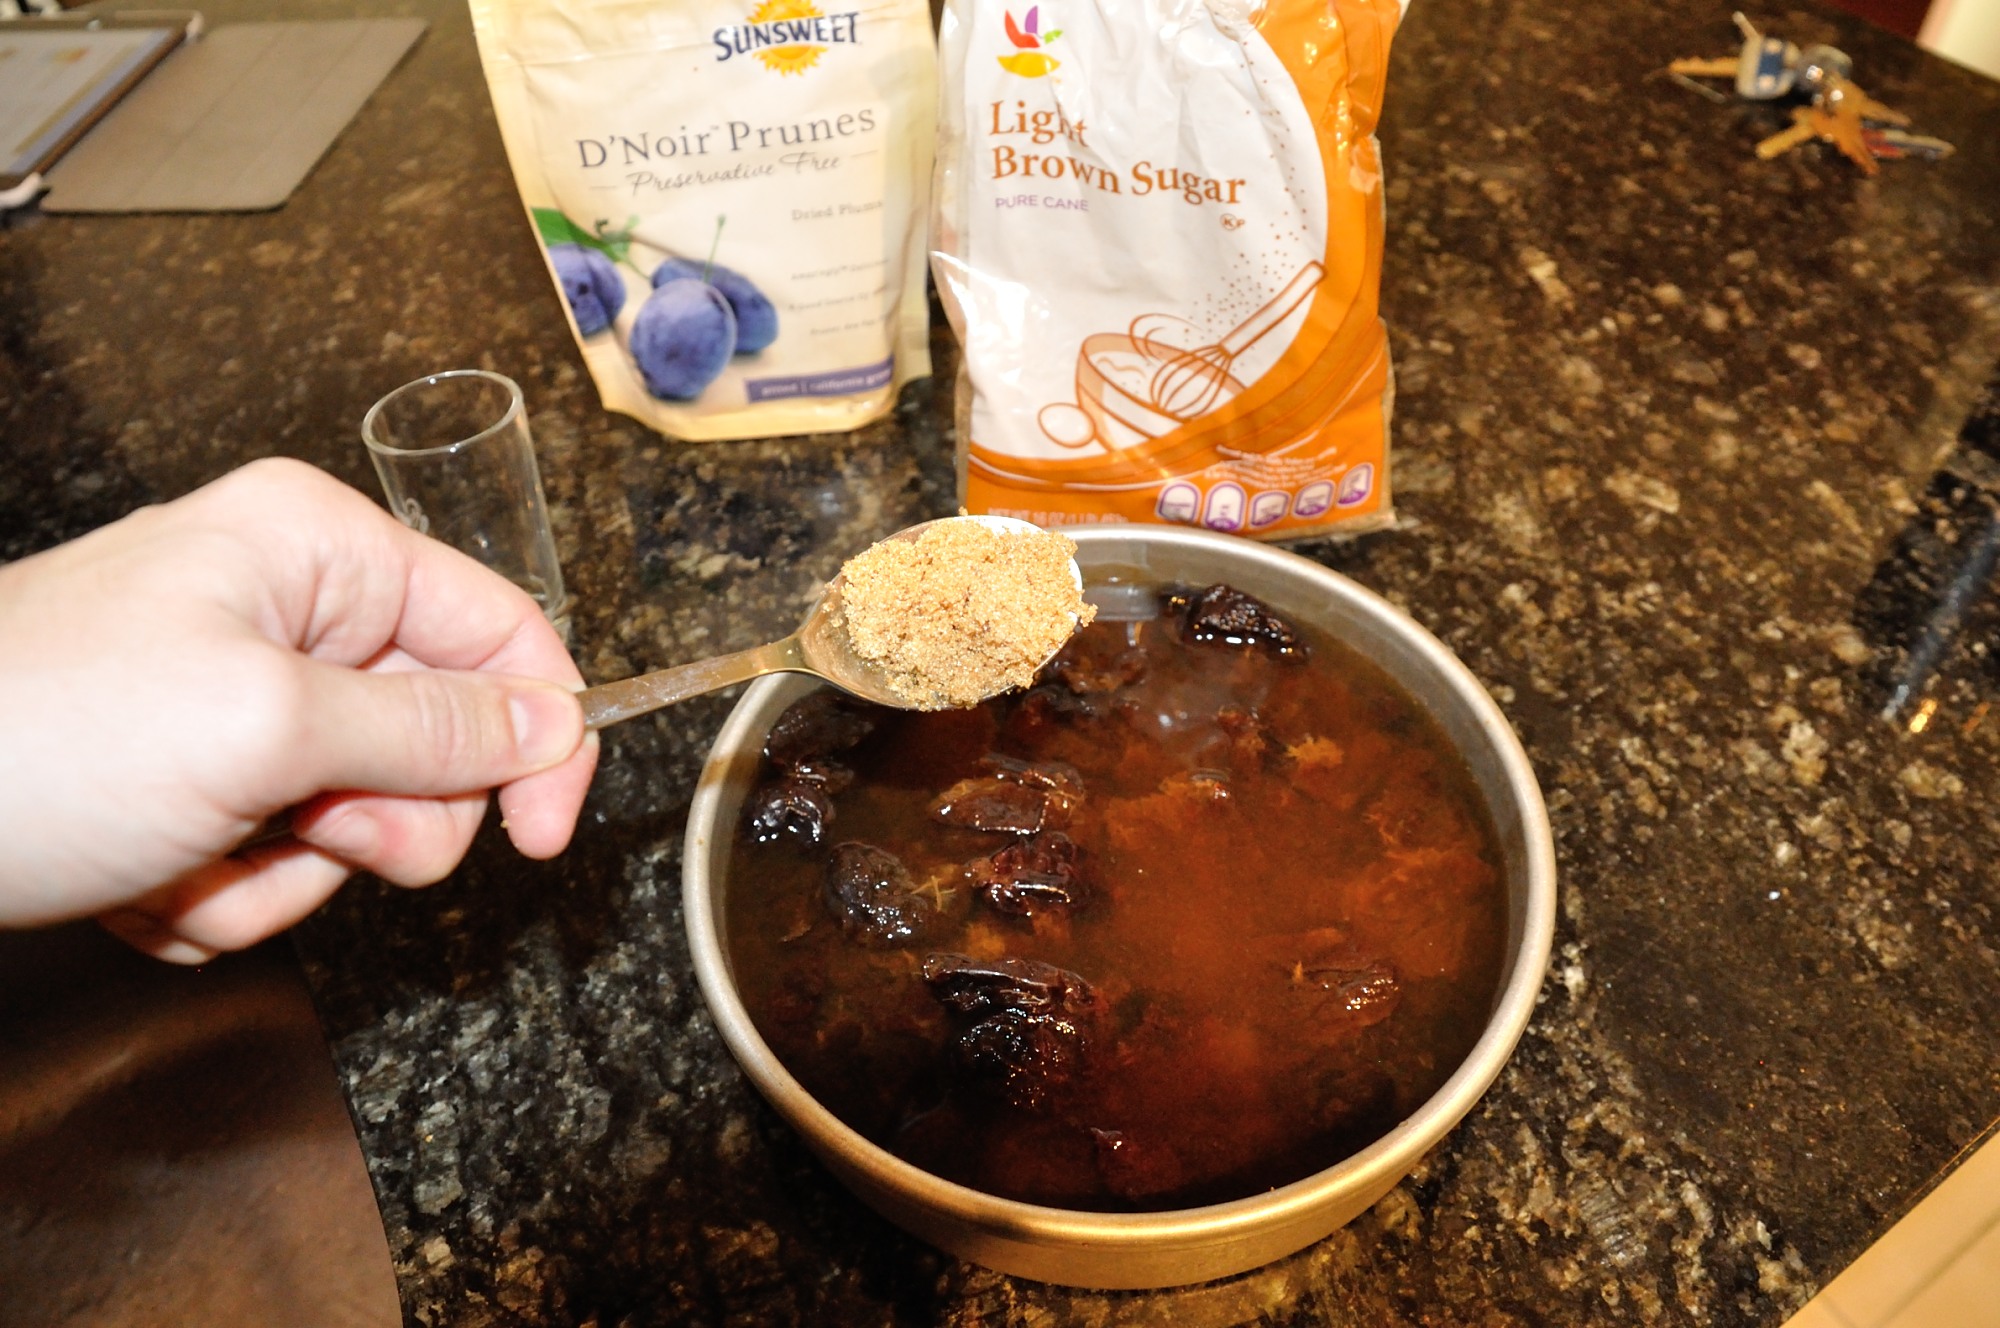
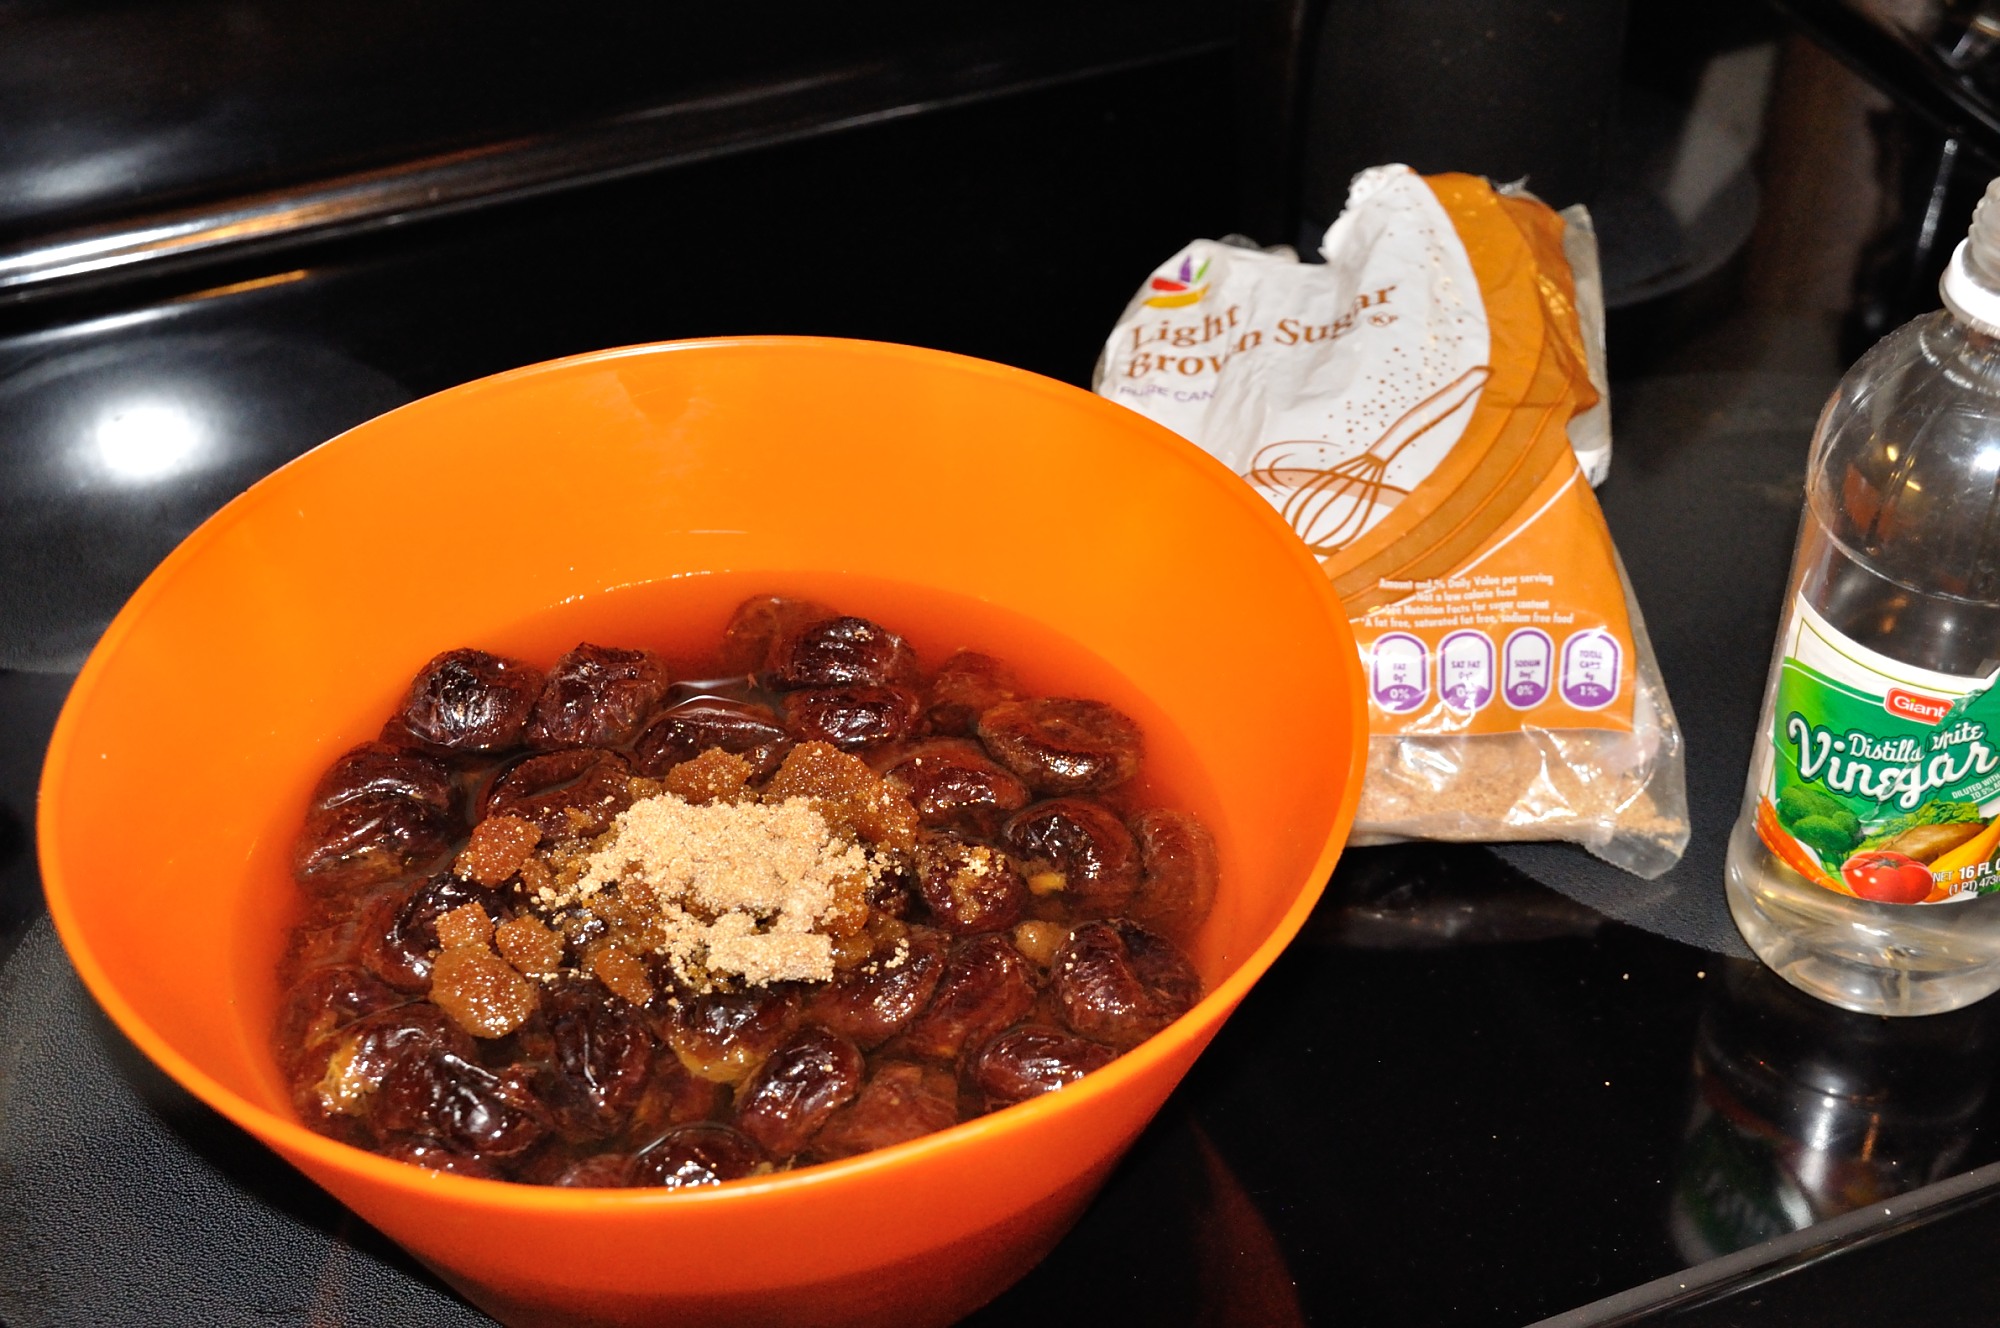
Ingredients: either fresh plums (Damson) or prunes (I used 2.5 packages), shot of rum, 1 tablespoon of vinegar, brown sugar to taste, plus mason jars and canning thongs
Time:About two days from start to finish, but the baking part takes between 3-4 hours
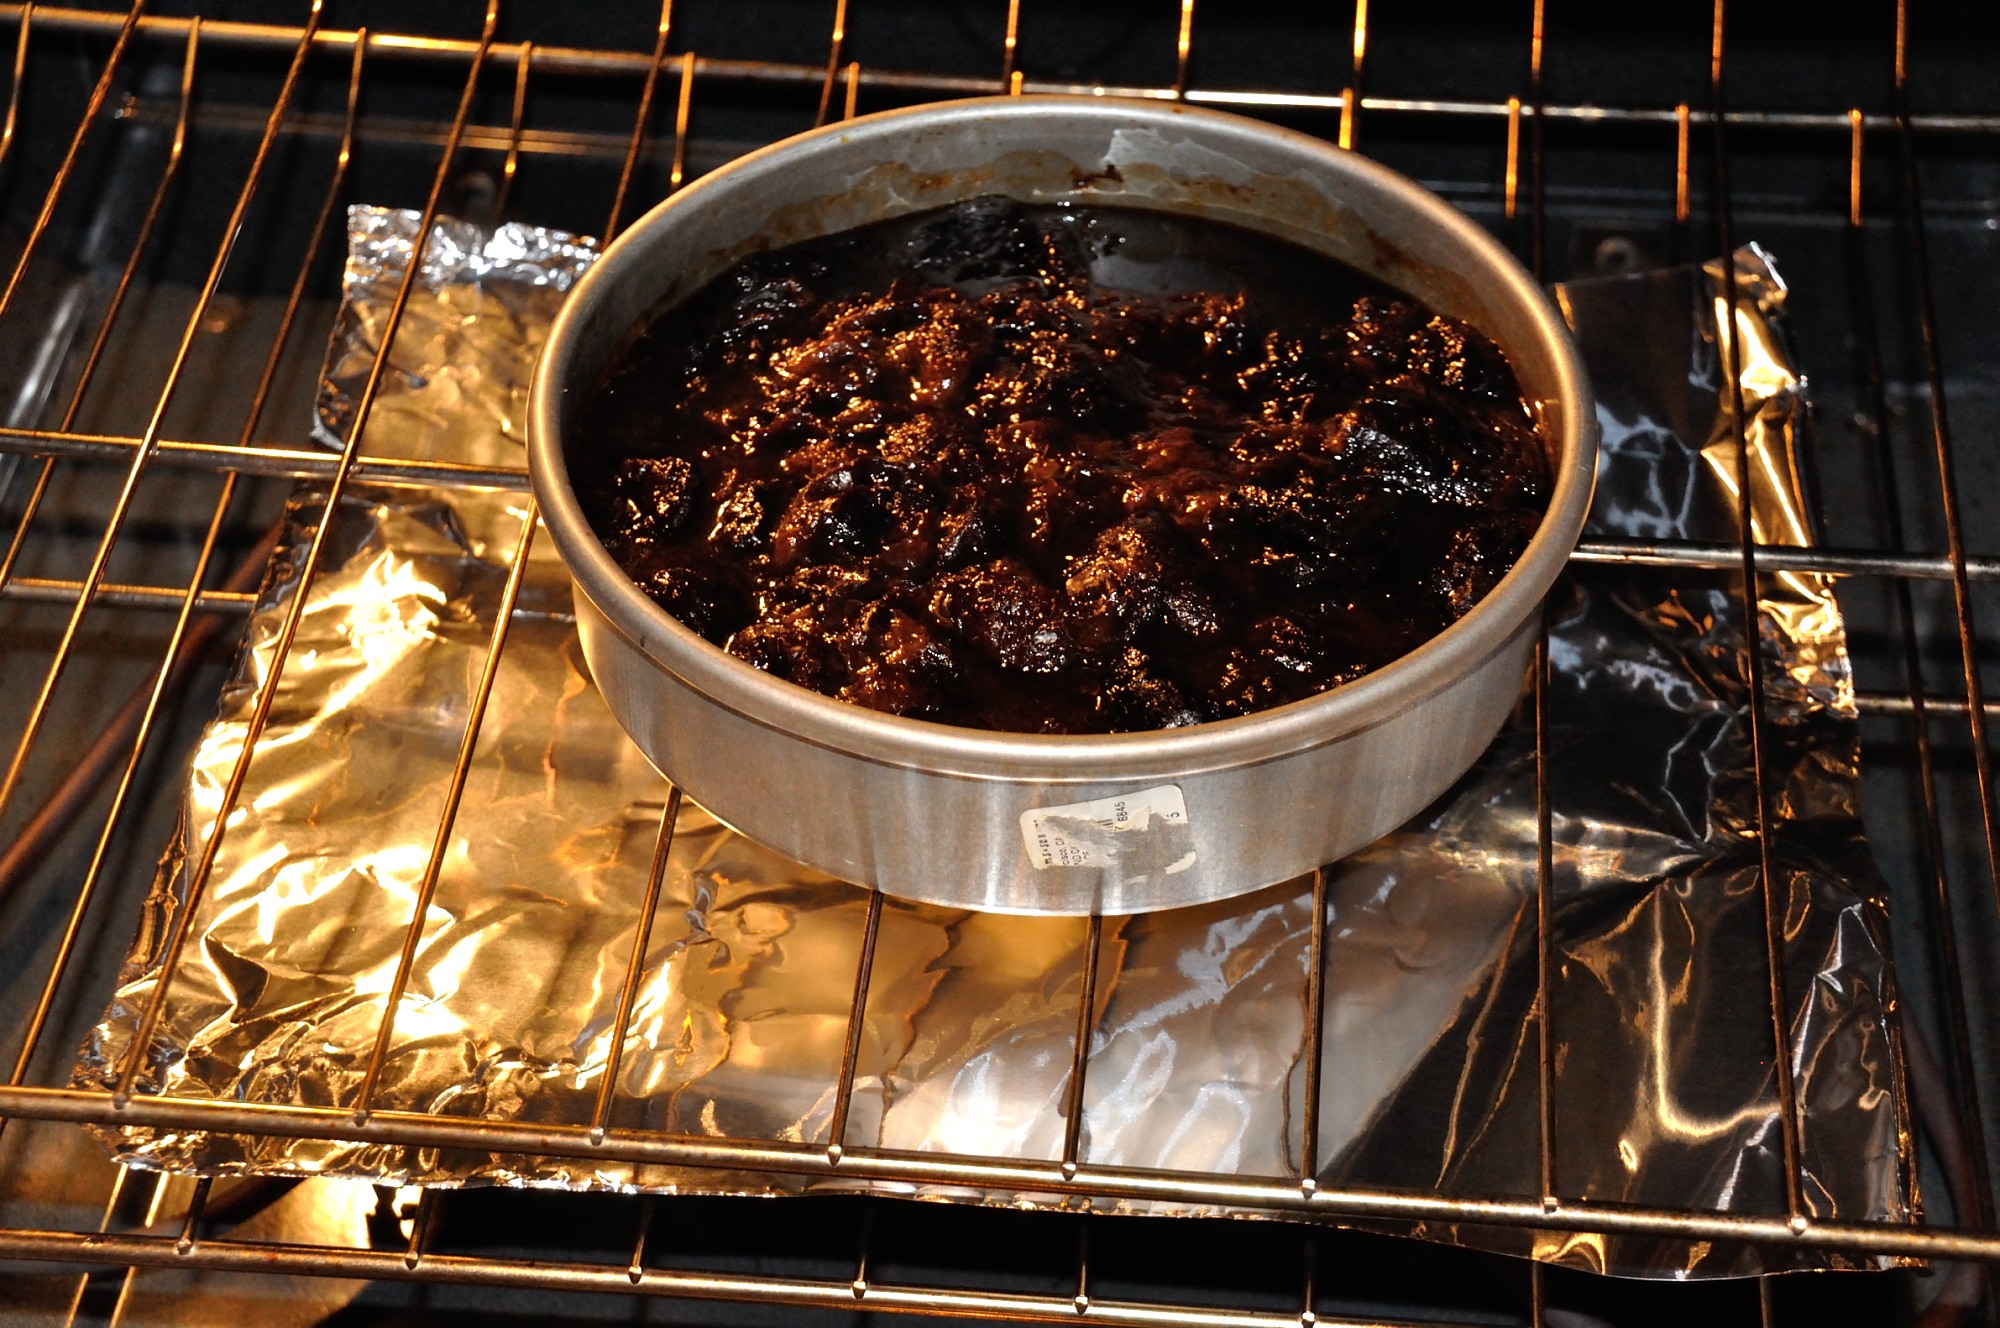
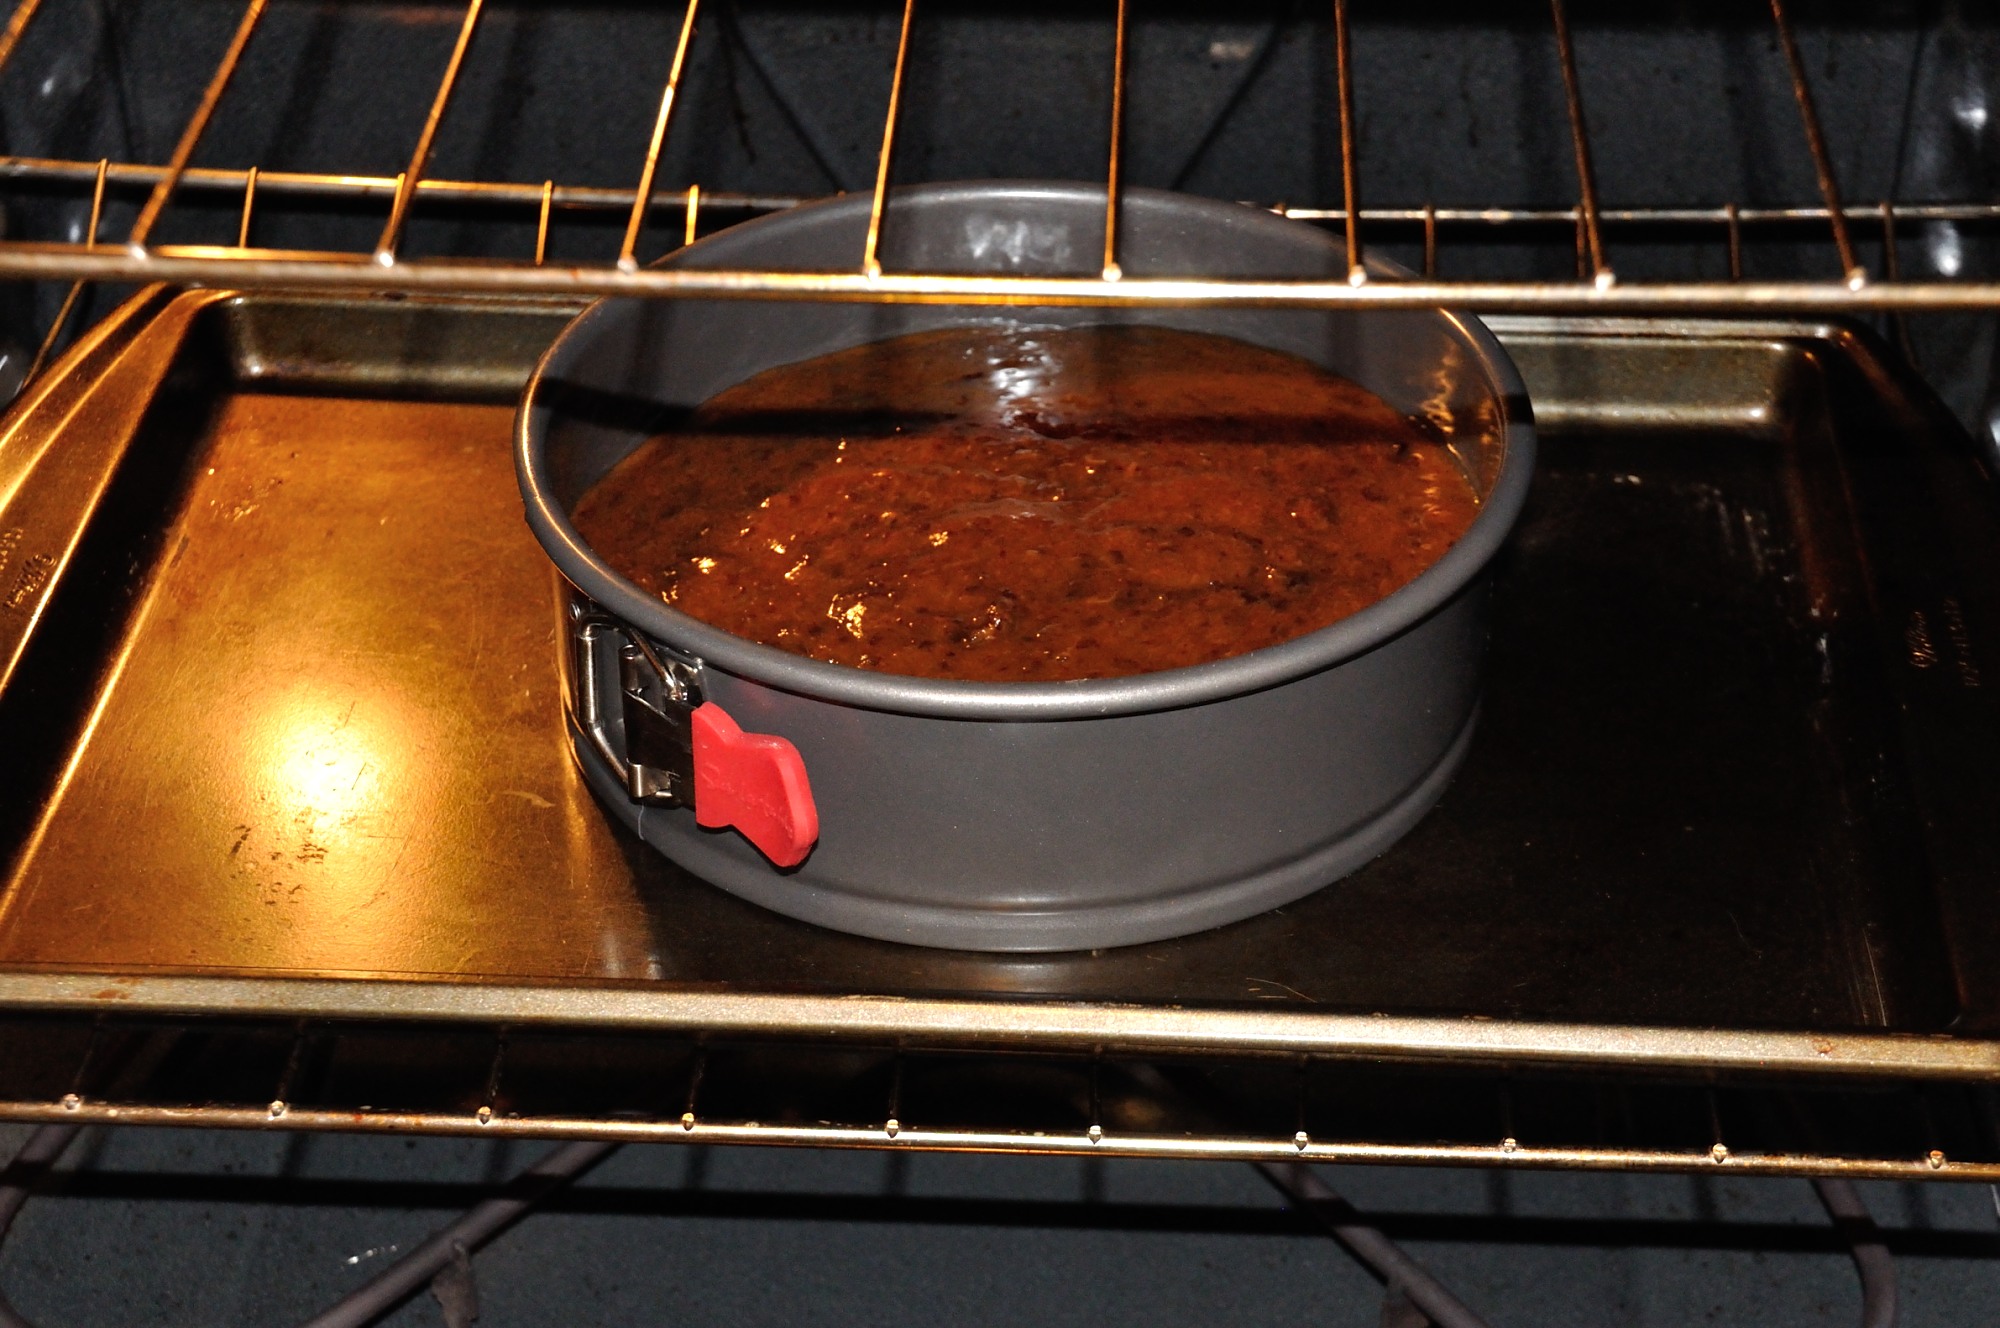
This post is actually the result of three different tries. They all started with the same ingredients but there were differences in the processing. The first try, for which I don’t have any pictures, was made in a pot by cooking the jam. This is a little bit messy and time consuming. I later stumbled upon a recipe on a Slovak recipe site calling for the jam to be baked (pečený). This actually makes perfect sense. On the stove top, the heat is delivered from one end only. Unless you continuously stir the jam, it becomes quite easy to burn it. On the other hand, the oven gives you a nice uniform heating from all sides. Brilliant!
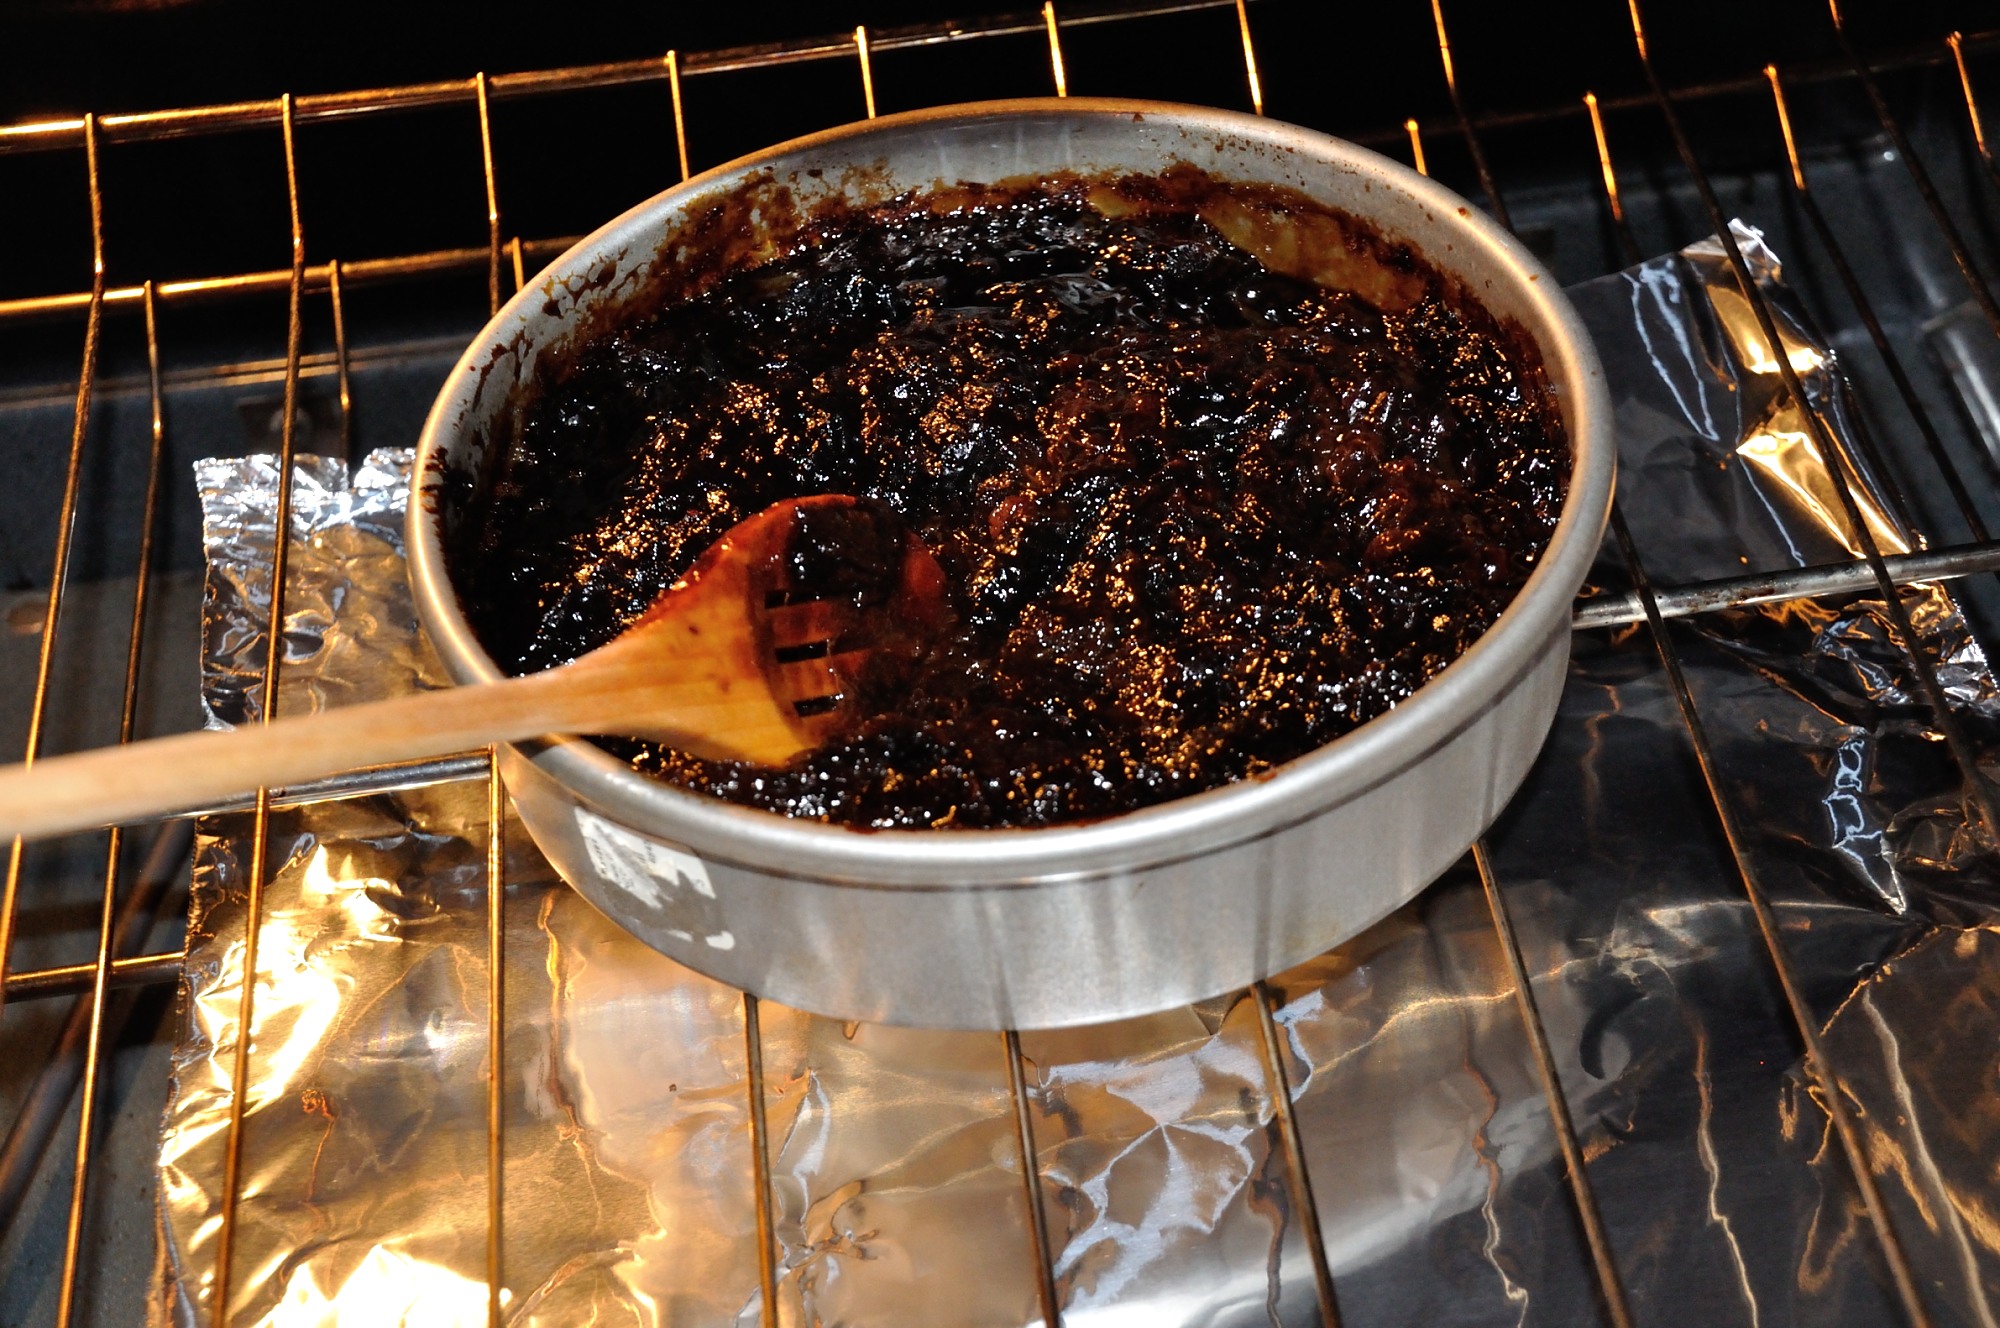
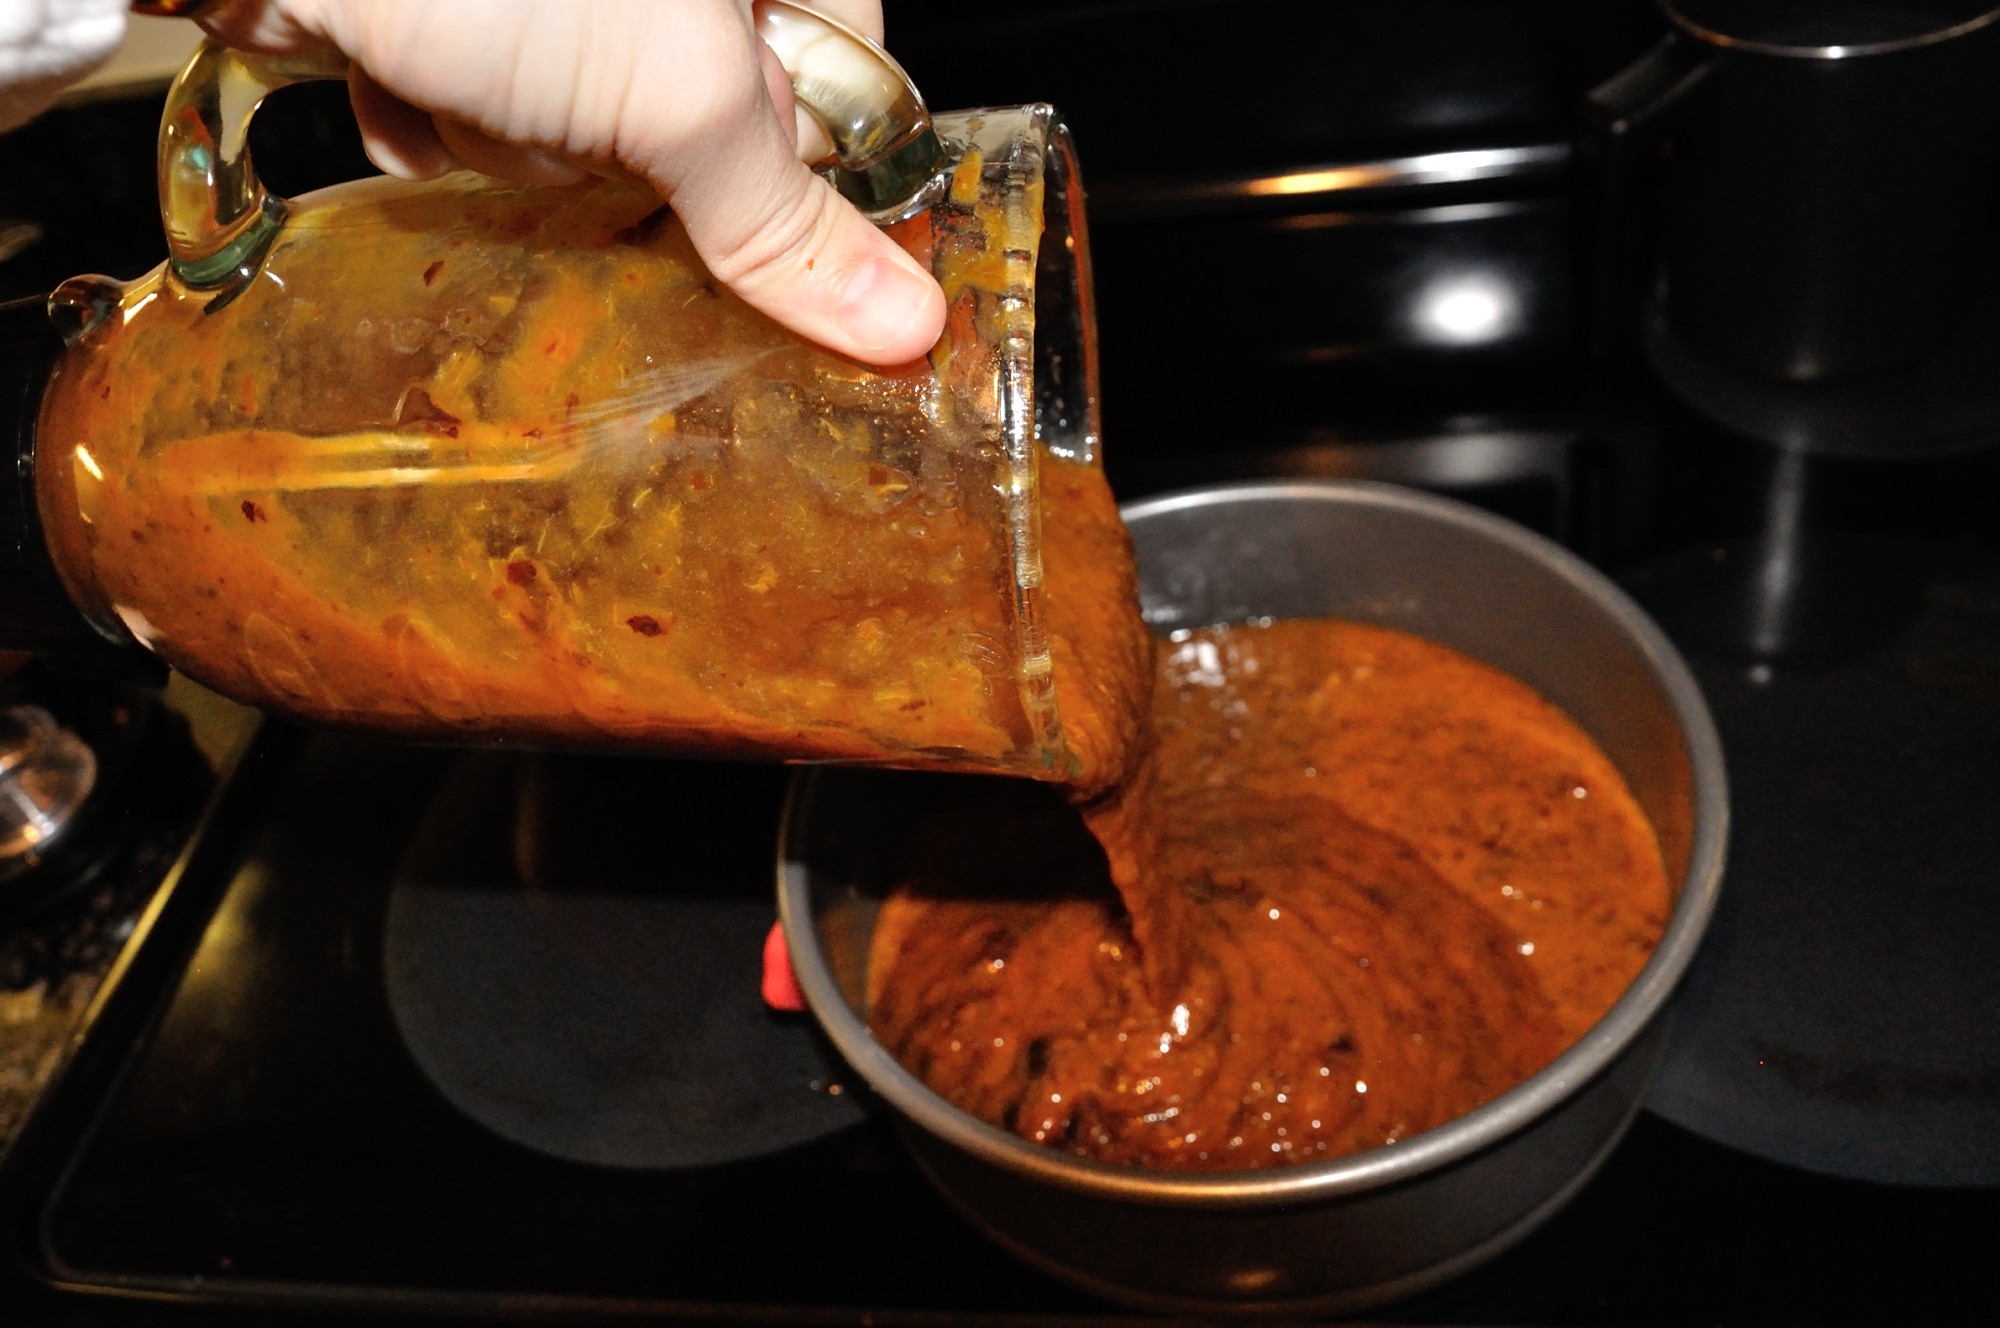
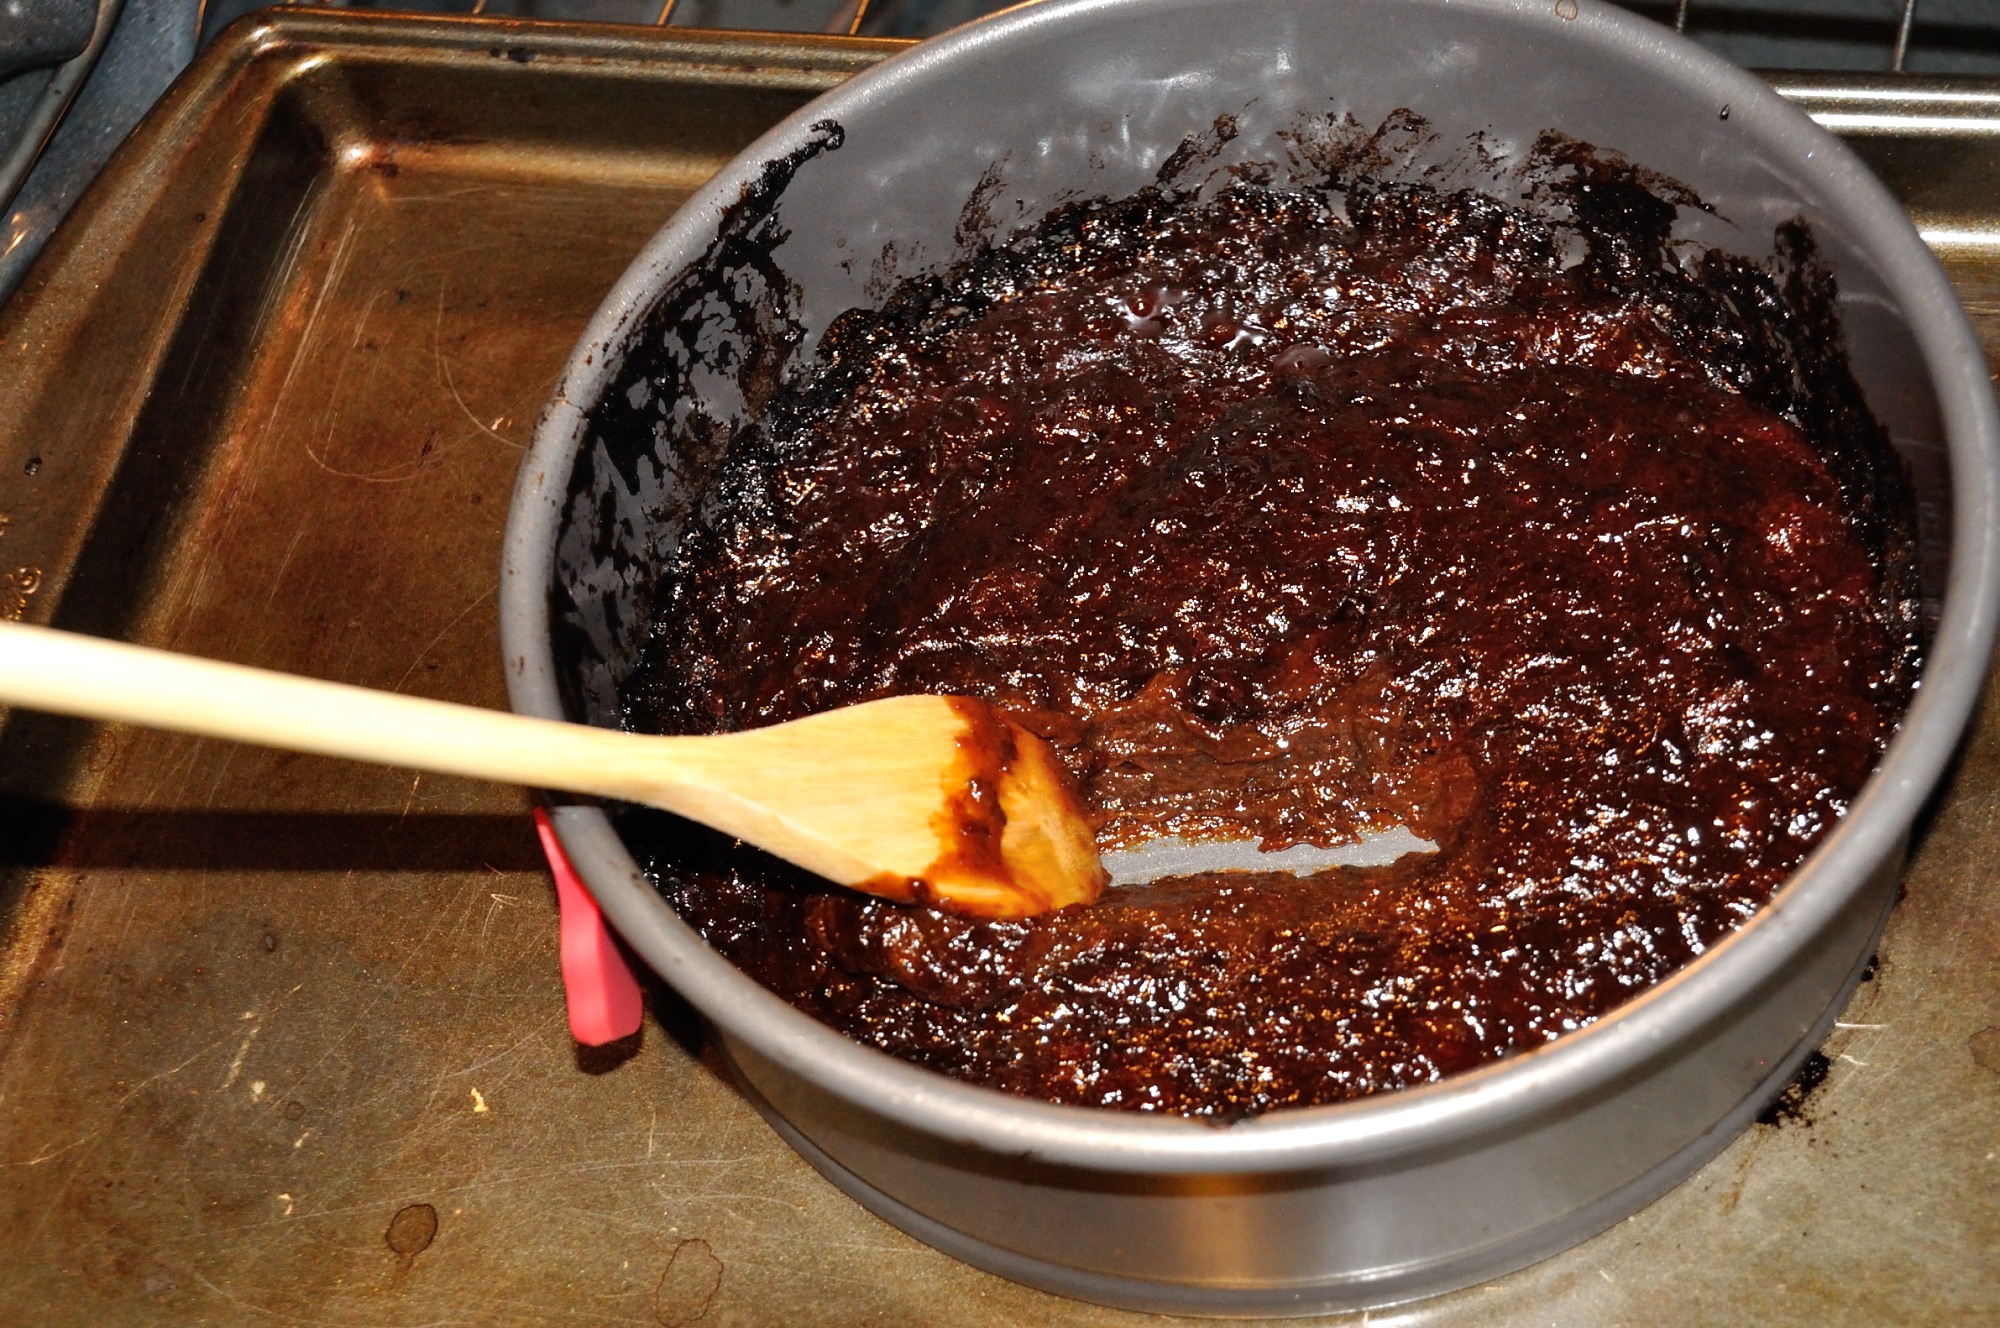
Try #2 (Baking)
The issue with the first jam was that it was quite thin – I didn’t cook it long enough. I used the baking method in try #2.
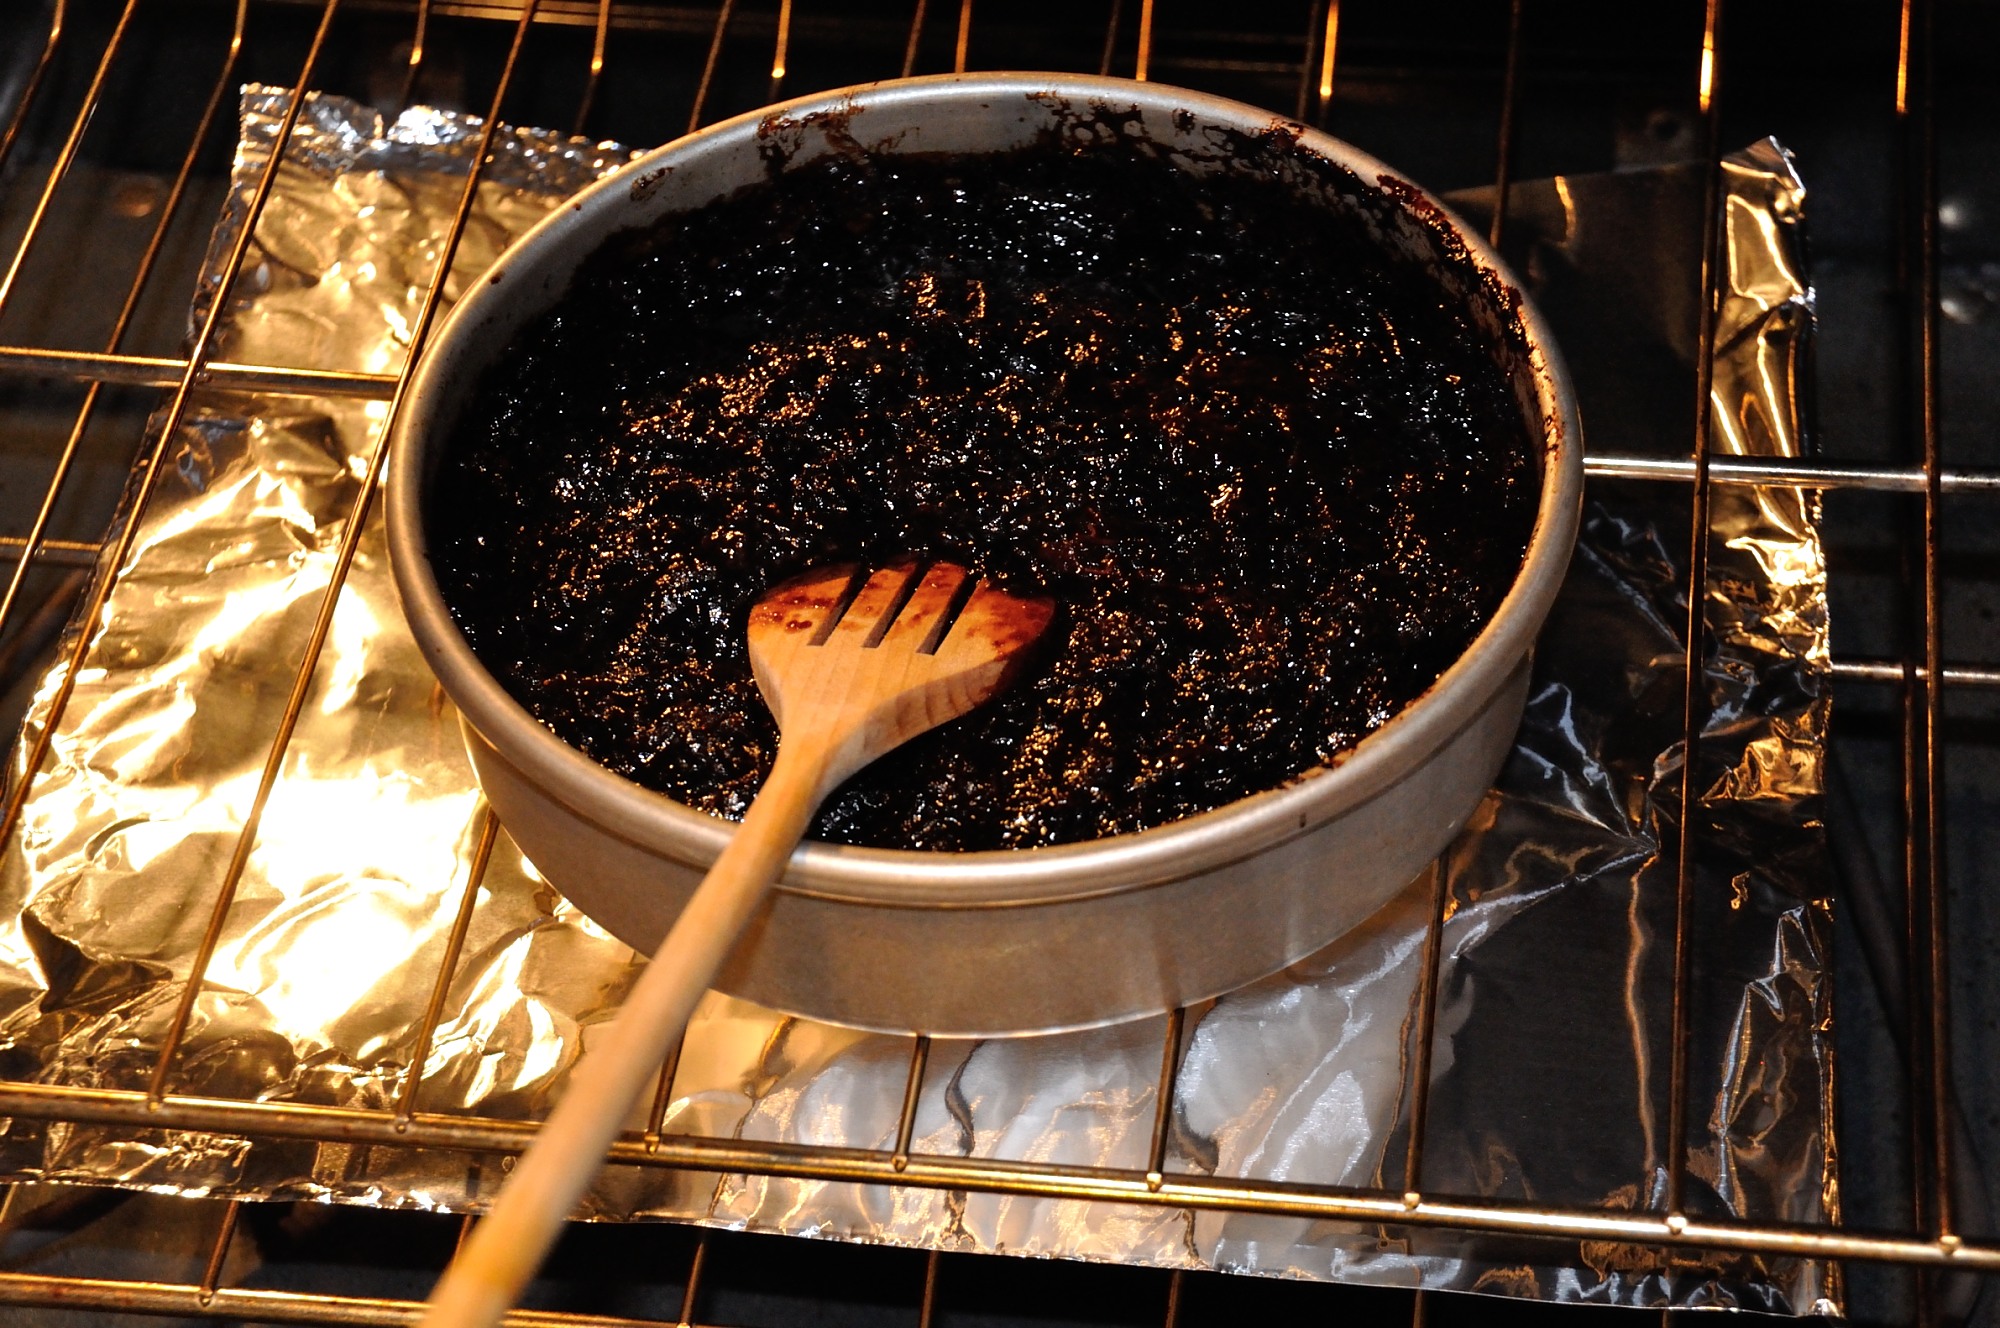
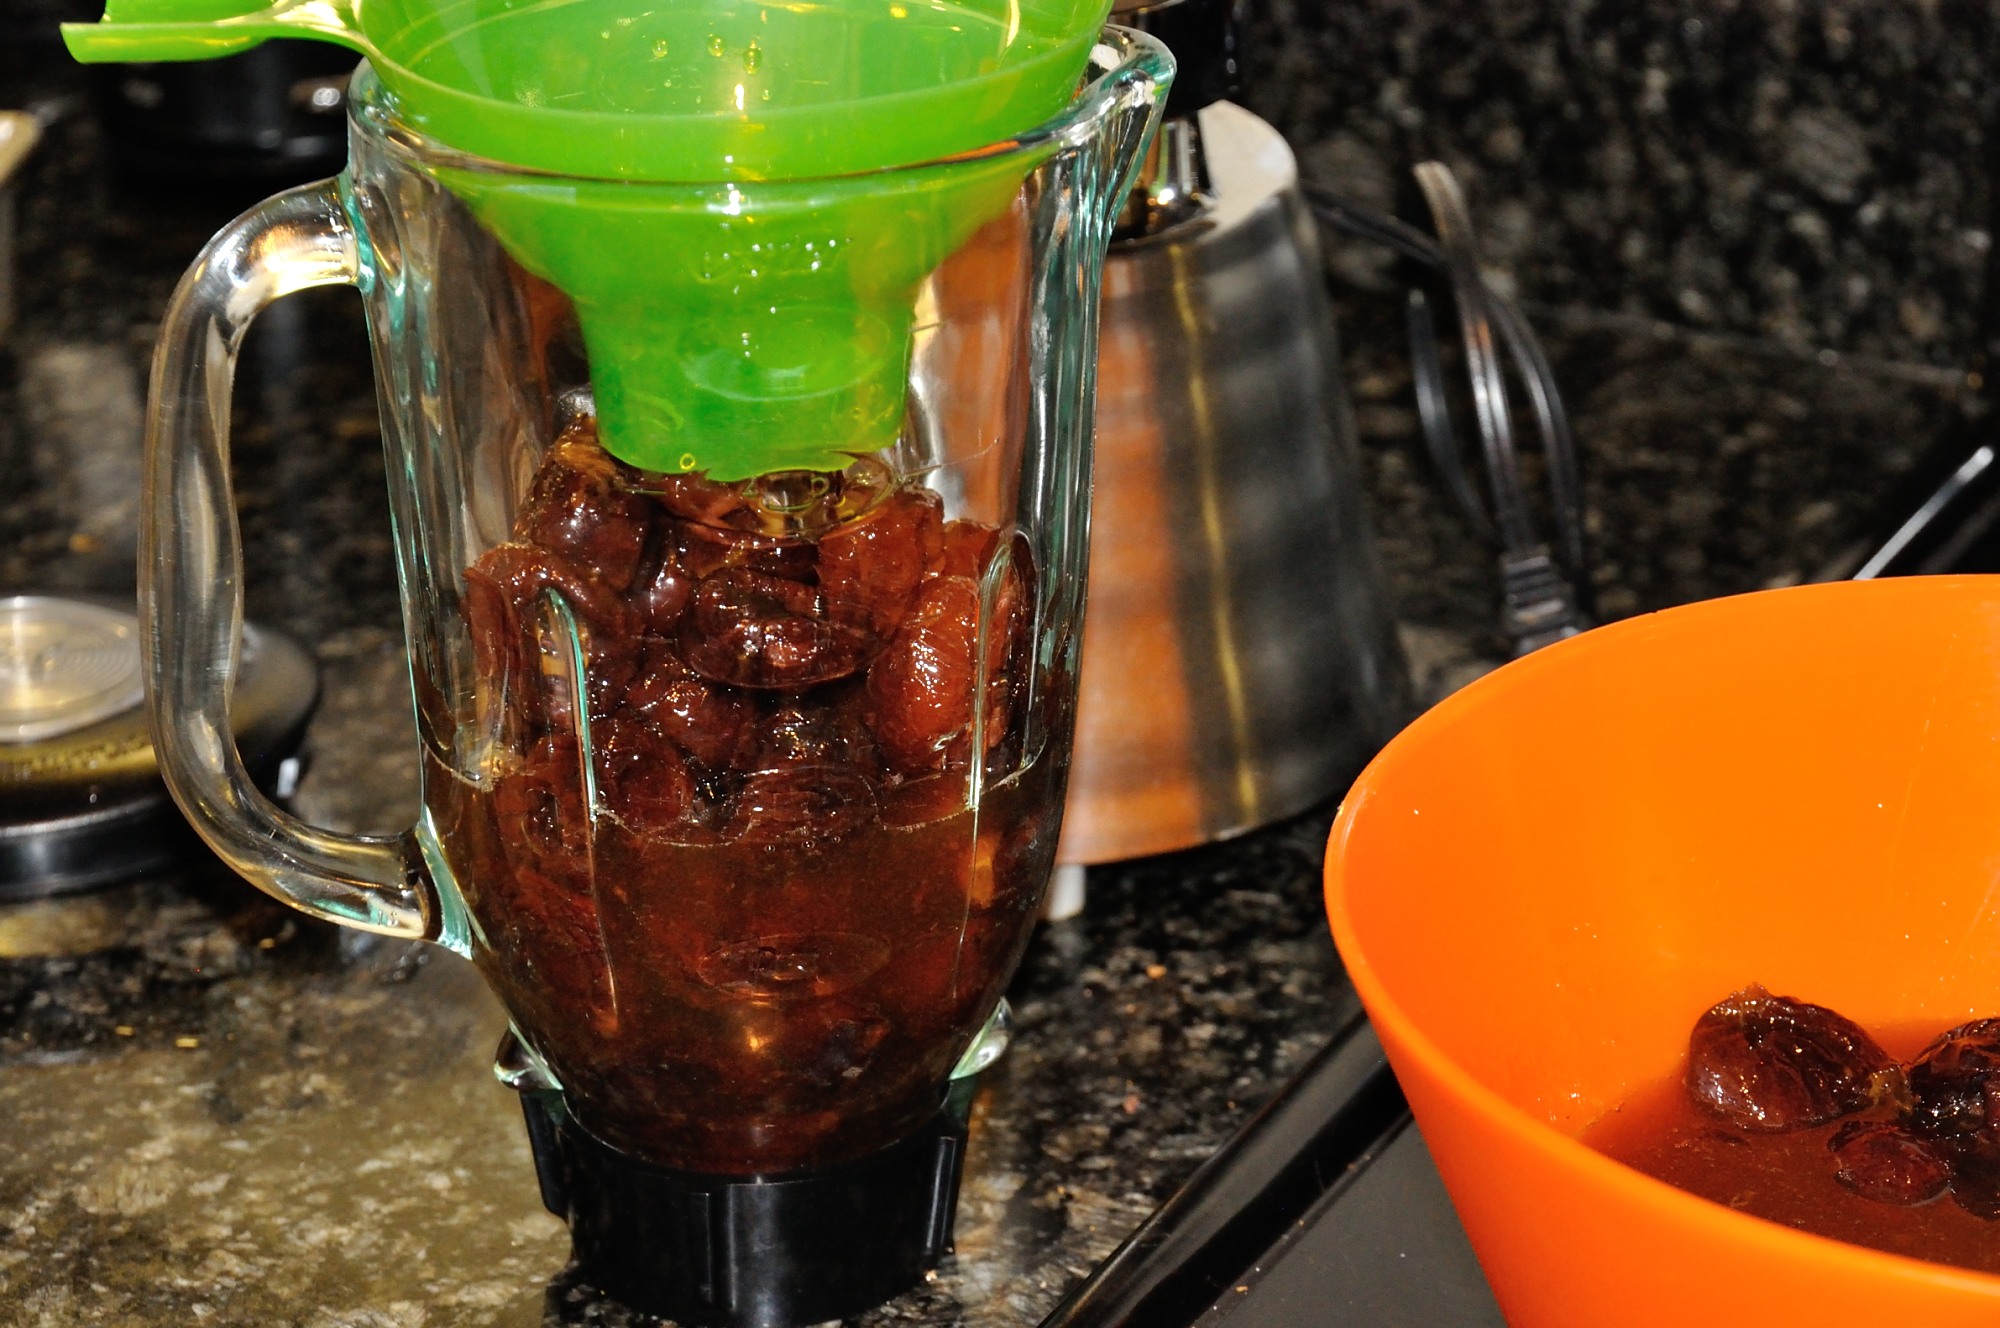
Try #3 (Blending)
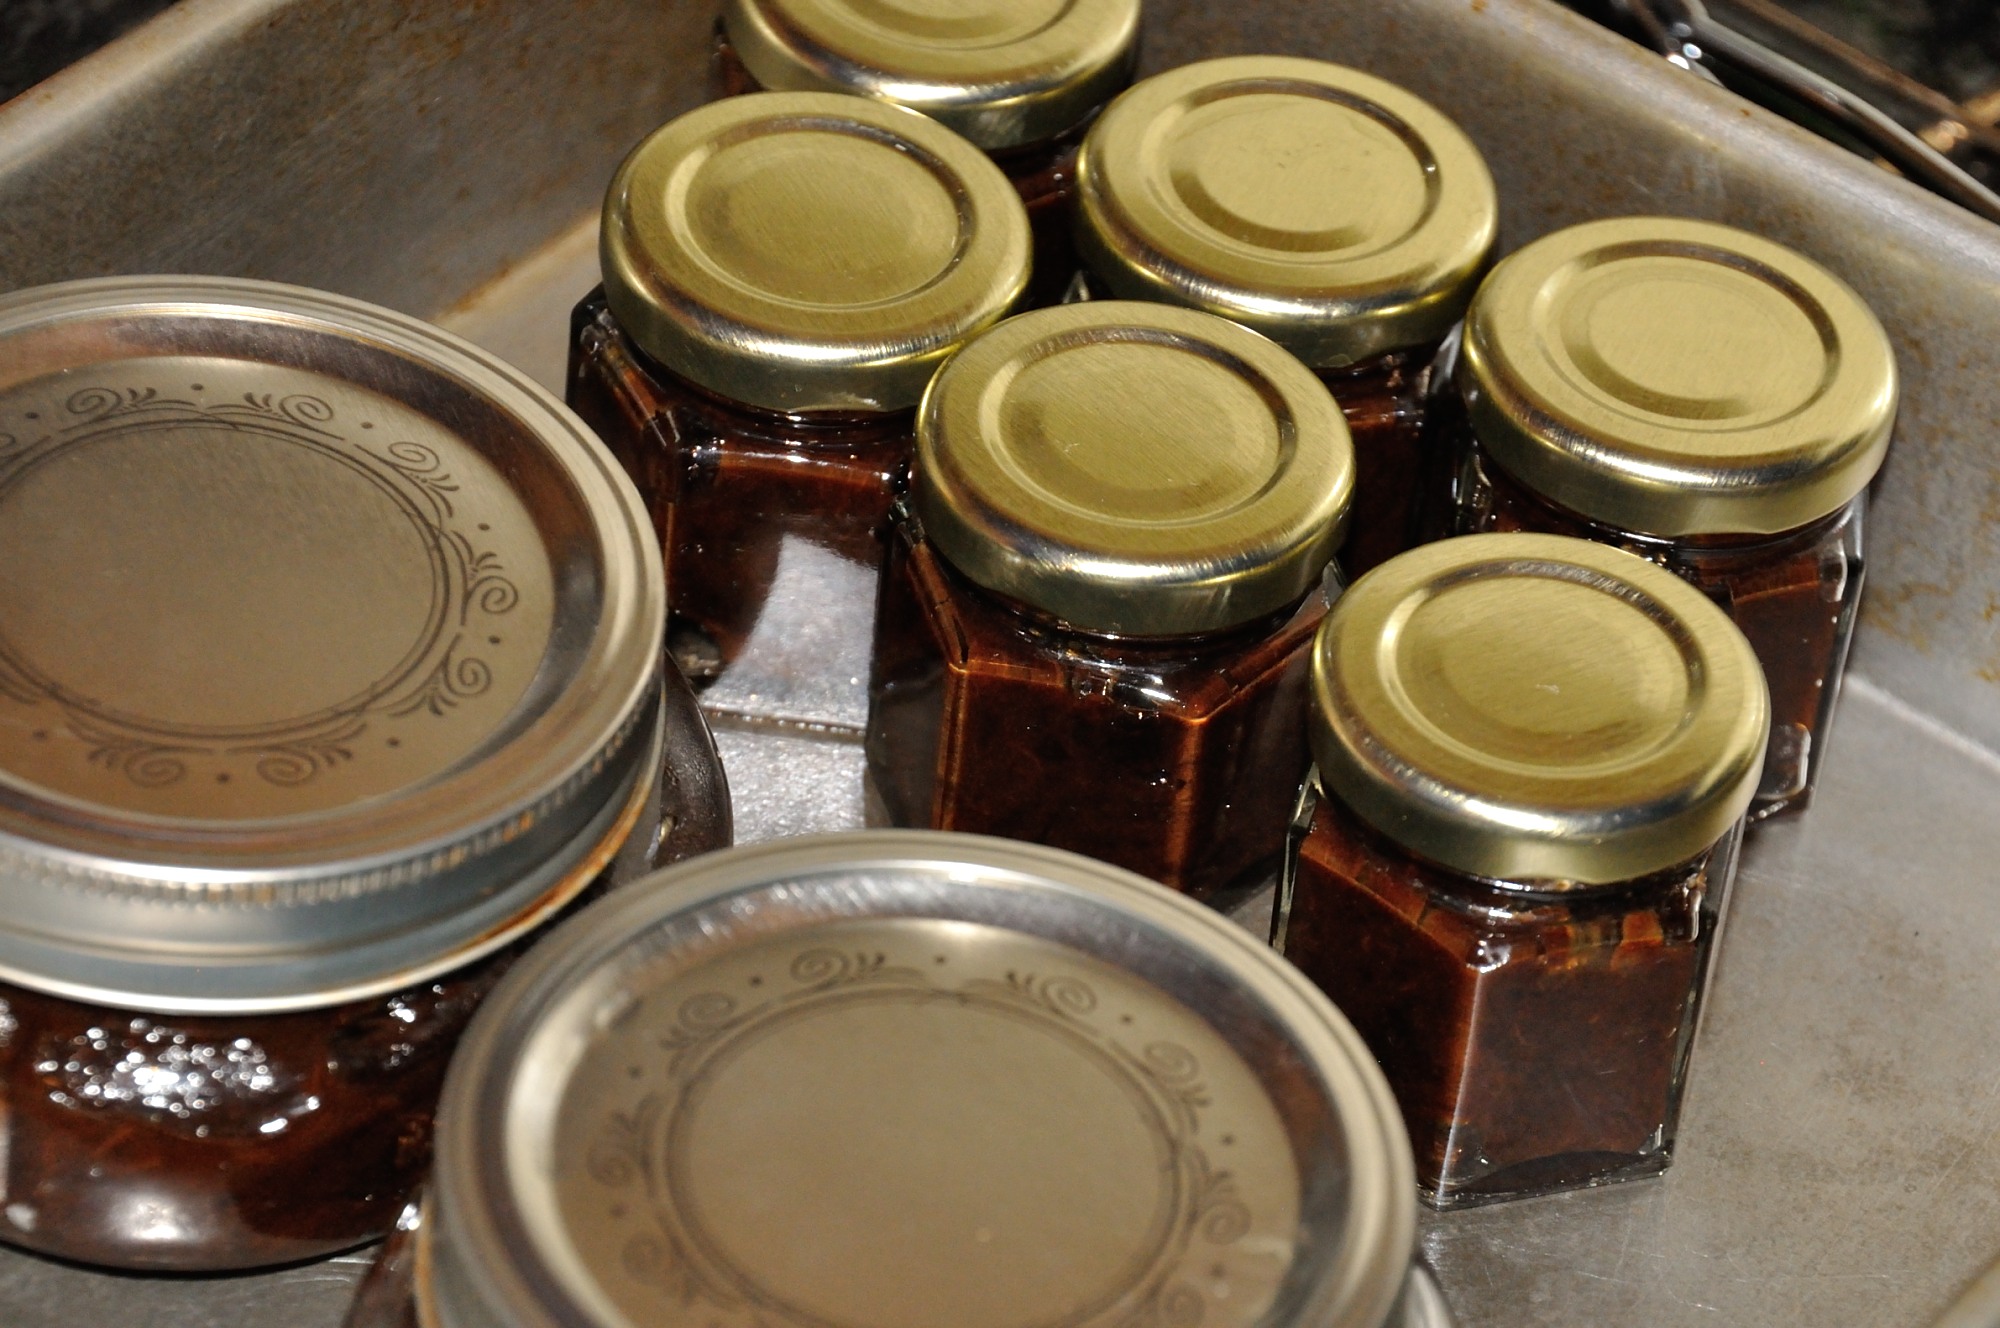
The other issue with #2 and also #1 was that since I used whole prunes with the skins intact, the jam was not particularly creamy. So I figured I could improve the texture by first running everything through a blender. This was try #3. The texture ended up better, but I was less impressed with the resulting color. It ended up more brown and less the desired dark blue / black.

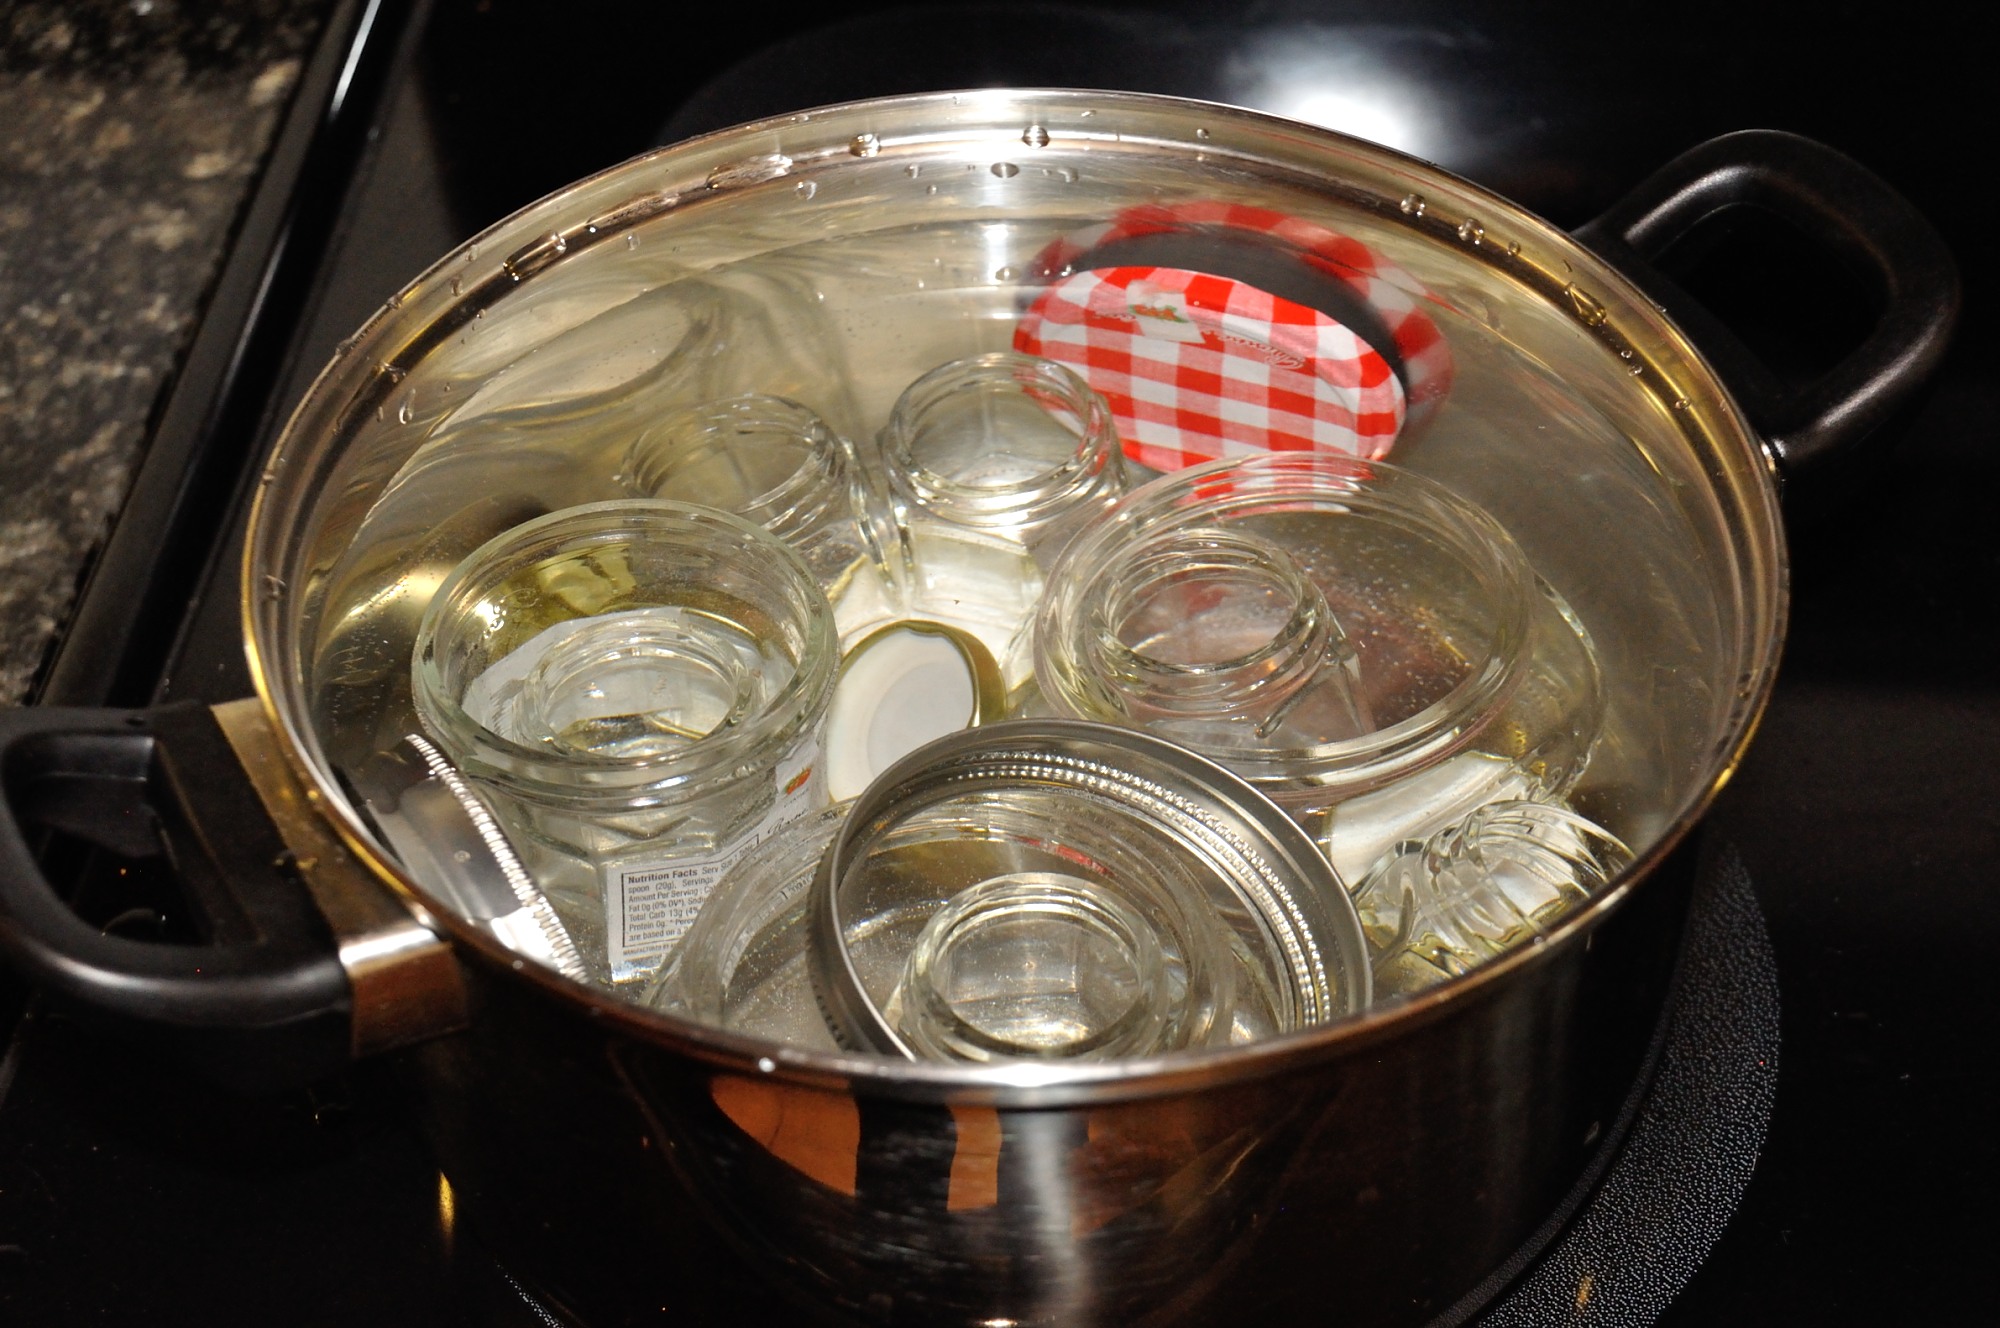
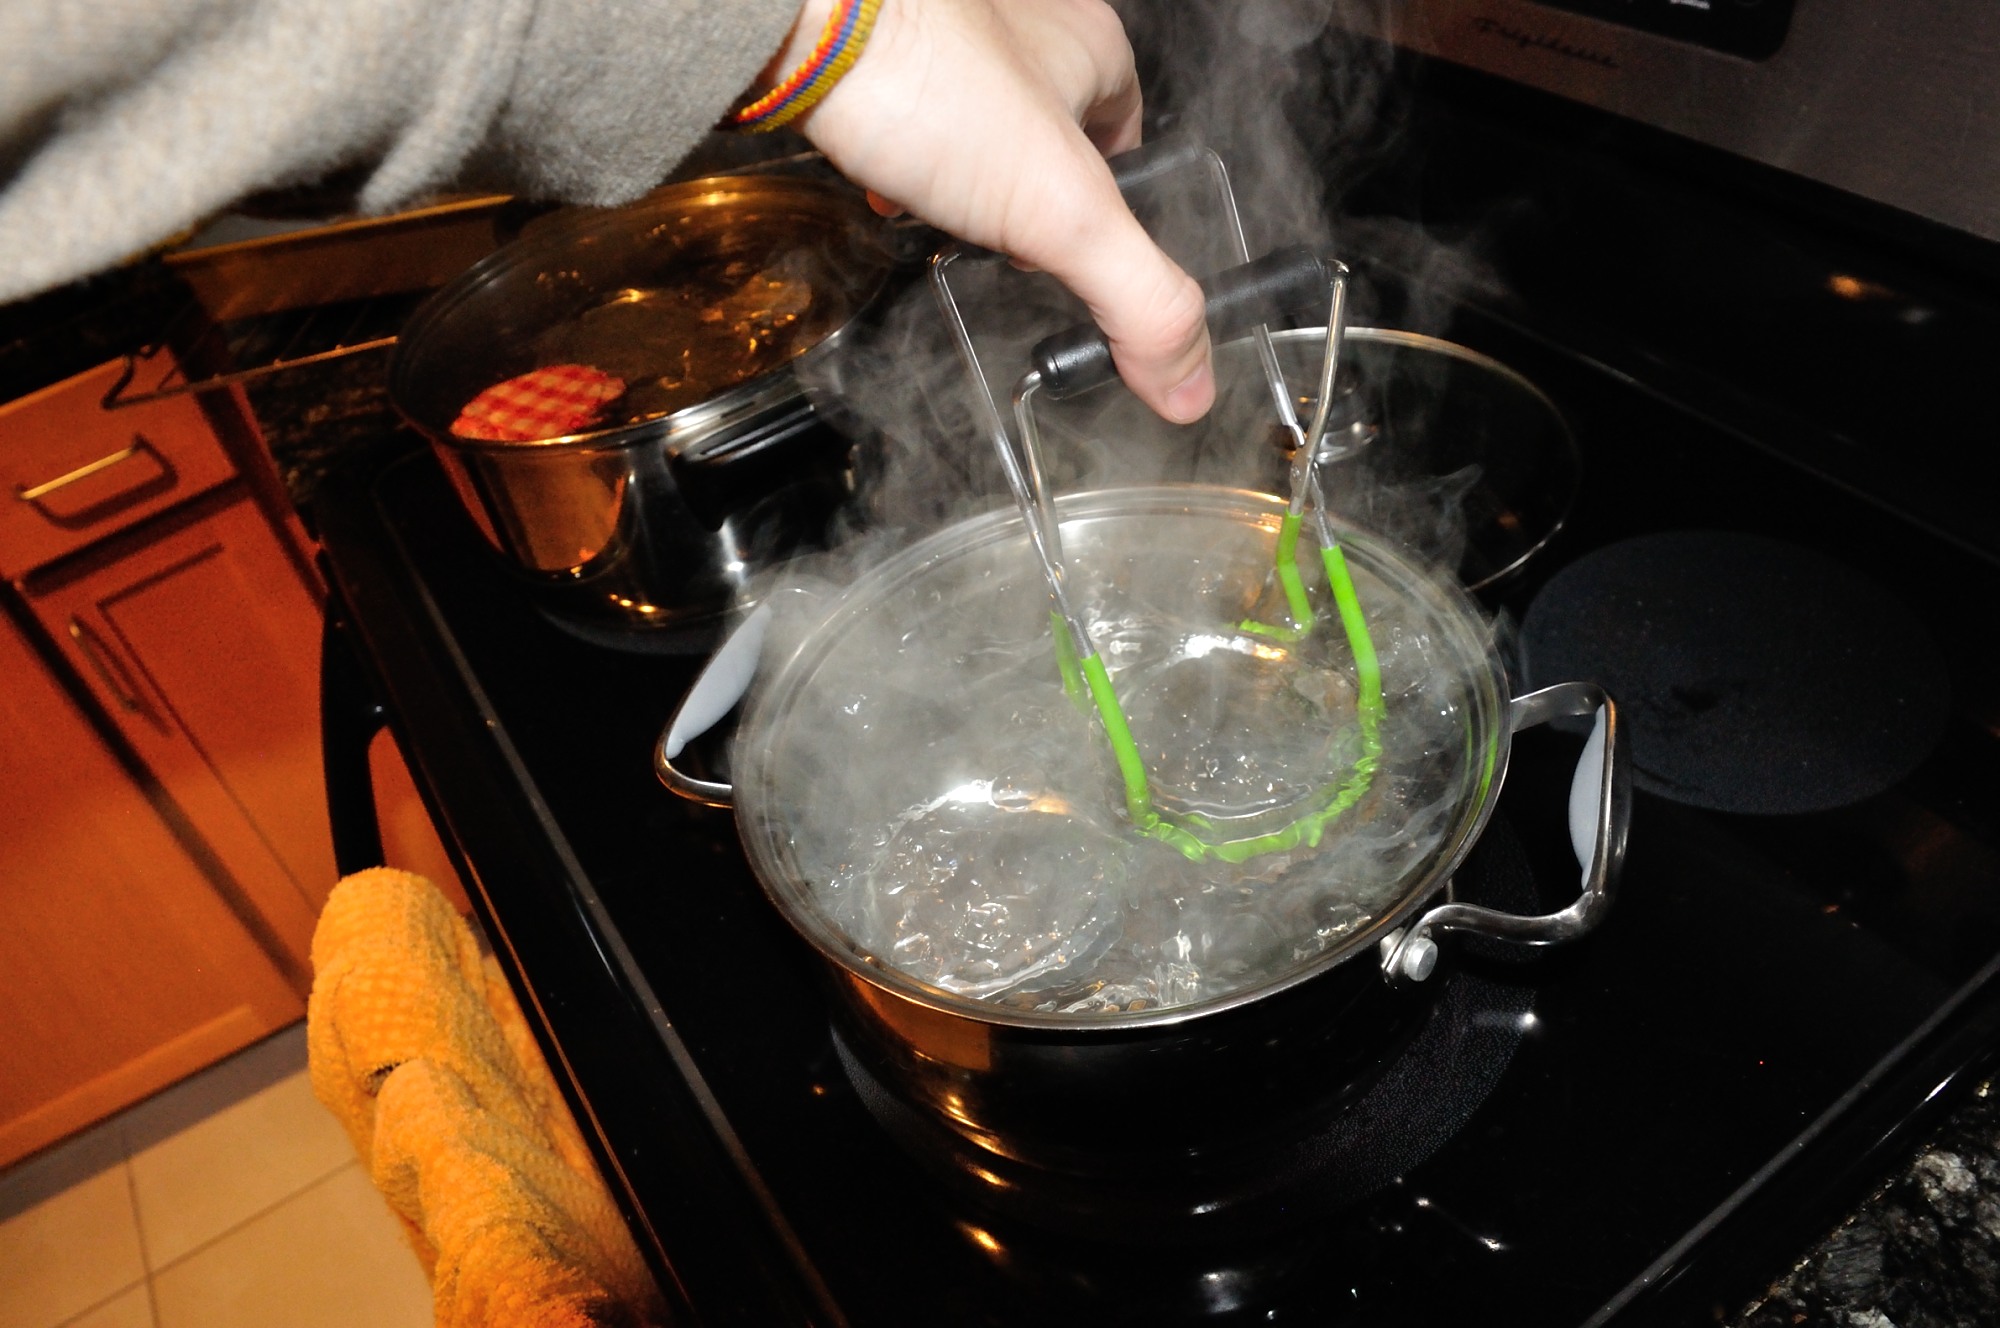
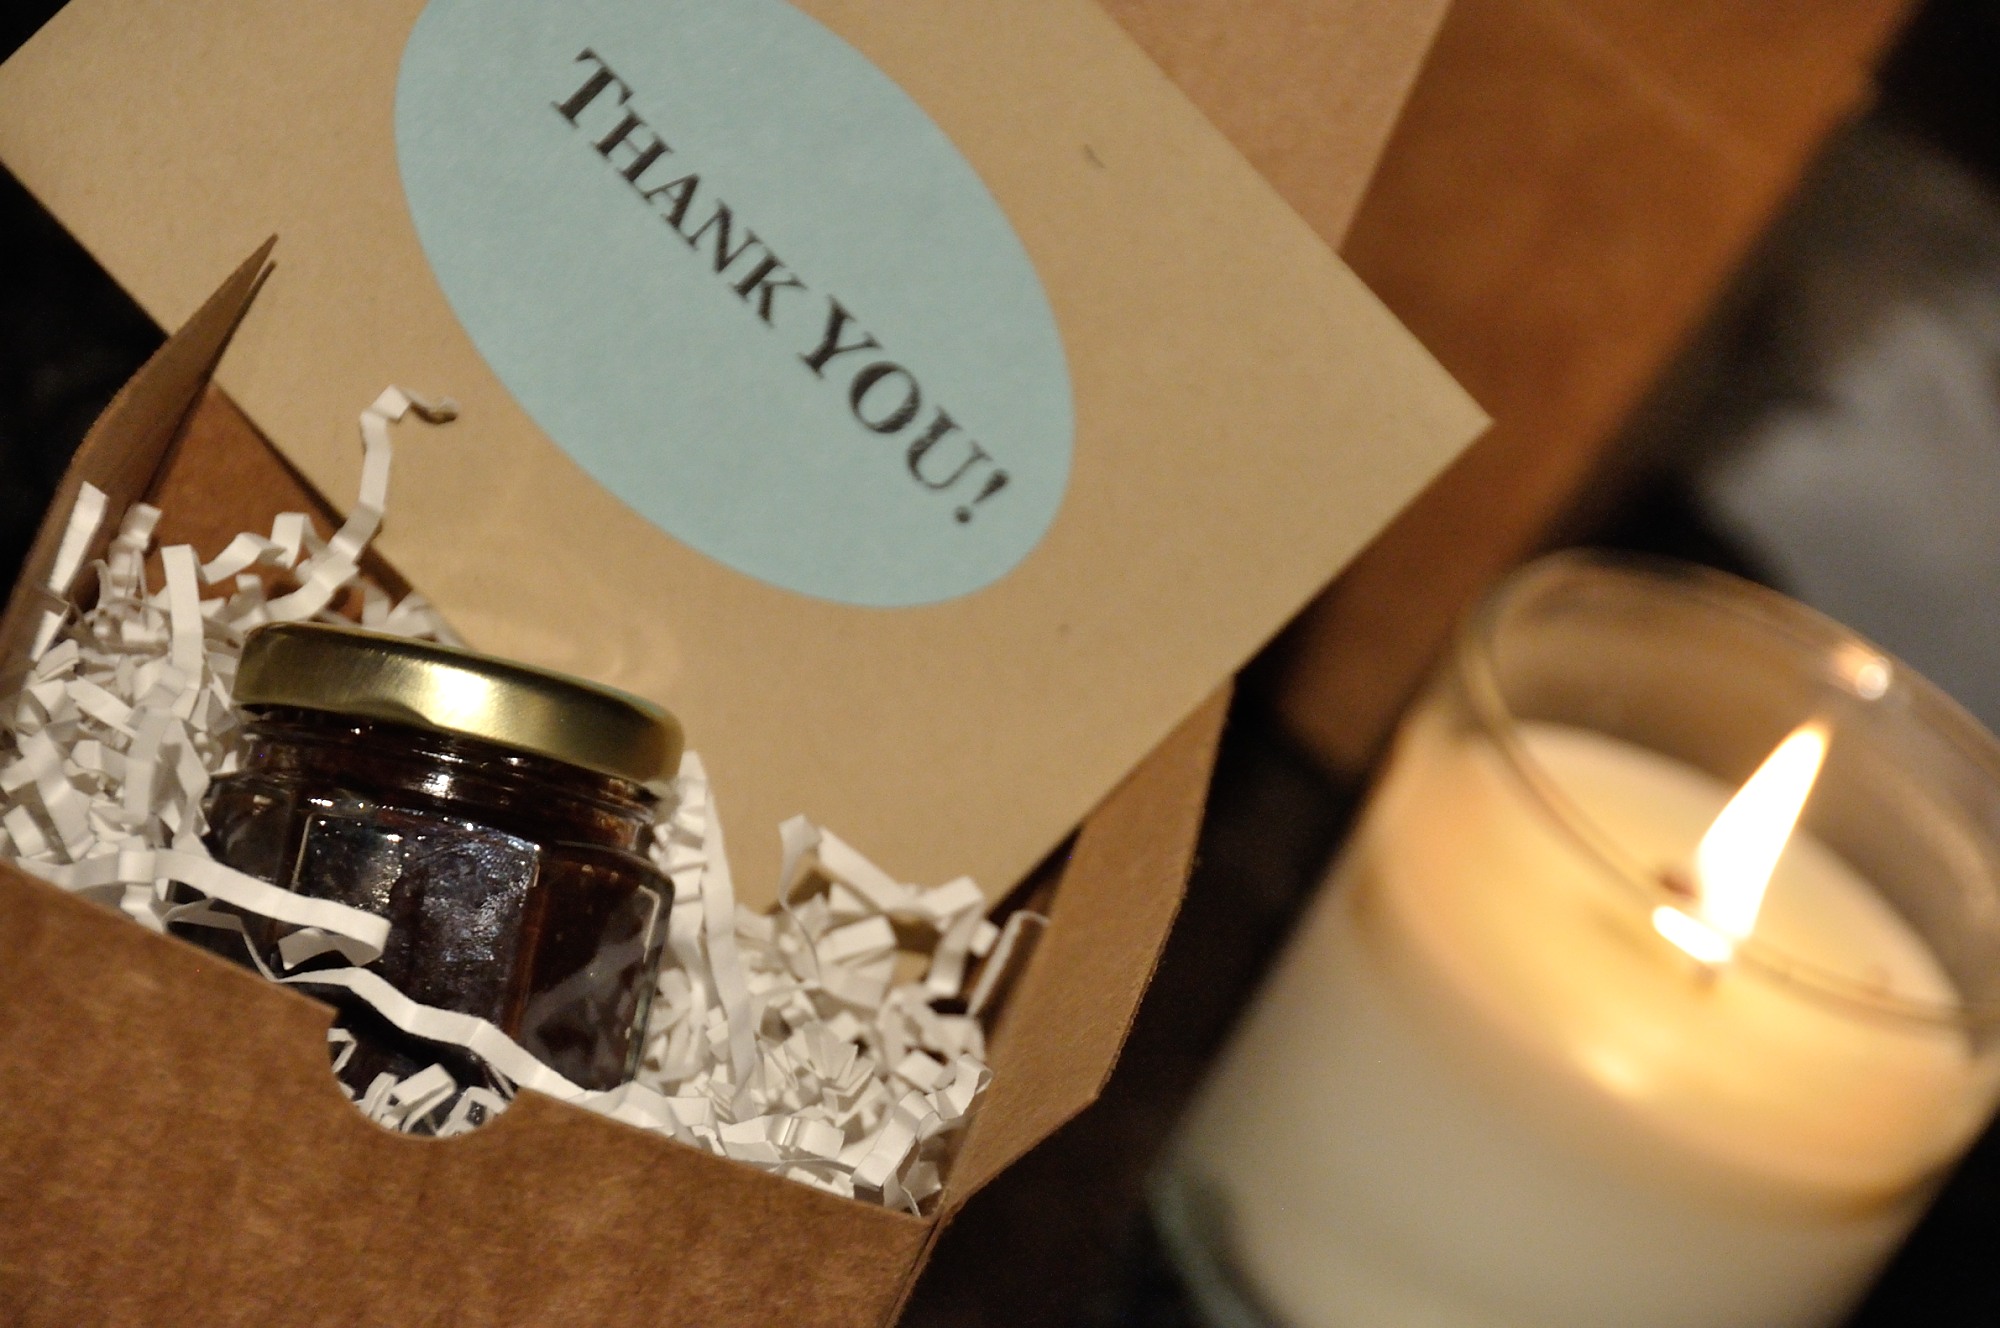
Preserving (Canning)
Finally, if you are making a lot of jam, and need it to last the whole year, you will need to preserve it. This is done by spooning the jam into mason jars, and then heating them fully covered in boiling water. This heating accomplishes two things: it kills off harmful bacteria, and provides an airtight seal that prevents new bacteria from getting in.

Hi Lubos,
GREAT RECIPE! Thanks for sharing it with us. I, too, have a hard time finding plum jam (povidla) either in the U.S.A. or in the UK (although there are some Polish stores that sell them, but they are not particularly tasty). I was going to suggest to ‘bake’cook’ the prunes in a slow cooker. That would, of course, take longer then 3-4 hours, but it would a gentler way of cooking it. What do you think?
By the way, I ♥ your recipes, they are wonderful and super delicious. Have a great day!
Hi Ella, somebody else also mentioned the slow cooker. It definitely sounds like it would work. The only problem: I don’t have a slow cooker!
Oops, I just woke up, saw the recipe and replied with several mistakes (missing words in the text, lol). Sorry about that, my apologies.
Great site! Now I’m hungry…
If the plum jam to fill 96% alcohol, it can harden in the refrigerator of pectin.
It turns jelly with 40% alcohol.
In appearance your Gem, very similar Tkemali.
Plum sauce Caucasus.
By the way, a little-known fact.
Slifovy sauce requires aging in the cellar, for about a year.
Tkemali excellent seasoning for meat.
Thank you for this site. I was born in Bratislava and came to Canada at 5 years old. Most of these recipes I have eaten and I was able to share them with my 90 year mother. She is still alive and had a great time knowing these recipes live on. God Bless.
Hello, Luboš, and thank you for sharing another great recipe from the Slovak world! Thanks to you, I was able to make slivkový lekvár this evening, using wild plums that grew here in Montana. After removing the stones, I had 4.75 pounds of plums – skins, pulp and some juice that had run out. I decided to cook them on the stove top in my enameled cast iron Dutch oven, which heats nicely and evenly on all sides with only a little heat on the bottom. I did not have any vinegar, so I used bottled lemon juice instead, and this seemed to work well. I didn’t know how much of the lemon juice to use, so I decided to try 2.5 tablespoons, just as a guess. (As it turns out, this might have been a little too much, so next time I will try maybe a teaspoon per pound). I had no rum or other liquor in the house, so unfortunately I have none in this batch of lekvár and will have to wait until my next batch to try it with rum. I started cooking the plums, bringing them to a boil and then reducing the heat to a nice simmer in order to cook the excess water out out of the pulp, stirring every 15 minutes or so and scraping the sides of the Dutch oven clean as the mixture bubbled merrily. These plums were a bit tart, so I wasn’t sure how much brown sugar to add; however, after reading around, I decided to try 2.5 cups and see how it would work (this seemed just about right). Along the way, I also took care to gently crush the skins and pulp with my wooden spoon, which appeared to work well. After about three hours, the mixture reduced very nicely to a thick, lumpy paste that seemed to have all of the excess moisture cooked out and tasted very, very delicious, with a nice sweetness and maybe a bit too much tart. It was not the beautiful purple-black of the traditional plums, but more of a nice, dark reddish colour with a little purple and brown. After processing in hot water with mason jars, I ended up with 5 half-pints and 1 quarter-pint of slivkový lekvár, and can’t wait to use it with various Slovak recipes. Thanks again,
Luboš-0000000, for the inspiration and instructions!
Whoops – my cat jumped on the keyboard there. Sorry about that ~
Here is a picture of mine of photobucket, if anyone wants to take a look:
http://i1008.photobucket.com/albums/af203/TasunkaWitko/2015/Slivkovyacute%20Lekvaacuter%20-%201.jpg
The colour comes from the fact that I used wild plums, rather than the beautiful damson plums, but the flavor was beautiful!
I use open slow cooker. It works the best to leave it cook at low heat overnight.
With high temp. cooking, all alcohol from rum will be lost by evaporation. No need to remove bubbles from paste while canning. If can is capped properly when hot, it will create vacuum and no air can escape from the can. In fact, it is the vacuum which makes the can hard to open first time.
I made prune lekvar (not baked) with a recipe from the Pie and Pastry Bible by Rose Levy Berenbaum. It calls for 450 grams dried, pitted prunes, 470 grams water, 50 grams sugar, a pinch of salt, the zest of one lemon. You soak the prunes in water to soften them, then simmer them in the water in a covered pan for 30 minutes. Then process in a food processor with the zest, sugar and salt until smooth. Put the mixture back in the pan and simmer and stir until you get the consistency you like. My born in Slovakia wife thought it was great and has used it in some of her pastries. She says when she was a girl in Slovakia most people just bought prune lekvar because it was so cheap, but people made their own lekvar from other fruits. Her parents used blueberries that they picked close to her home.
Thank you so very much for all the recipes my beloved Mom cooked for my coal-miner Dad & my wonderful brothers & their wives throughout my early years. In my humble opinion, your website is, to me, priceless!! Love n’ Hugs n’ Kisses to you all!!! Cheryl
I buy my lekvar on line. go to www,solofoods,com. Simon Fisher Lekvar Prune Butter comes in cases of 6 – 18oz. jars. gluten free. sugar added, try it, you’ll like it.
Two things:
I grew up in country Australia, where my mother tried incredibly hard to find plums or plum jam that would do the trick for her recipes. We found someone who sold this. http://www.powidl.com/powidl.gif
Secondly, I steamed prunes in my babycook steamer and it gave the most delicious sweet/sour plum puree. Perfect for all things slovak.
🙂
I live in Dallas, and we at least get what they call “black” plums, but they’re really a very dark blue. All grocery stores have them. My Slovak grandmother in Cleveland had grape arbors and fruit trees in her backyard and my mother and aunts always made jellies and jams from the fruit, plus fruit pierogi and rolls. I never at any store-bought jelly or jam until I went away to college! I used to help my mother with the prep, but I’ve never made jelly or jam myself.
I’m a pretty old lady now, and make this pretty much the same as I learned from my mother–which is quite similar to these instructions. Like my mother, I don’t accurately measure anything: the amount of sugar is adjusted by taste, and the rum is a good solid glug (again adjusted by taste). I try to find the black Italian plums that are available in my area for just a very short while and also add a bunch of chopped prunes to the mix, along with a lemon and lemon zest. Something I do that my mother didn’t is to use an electric hand blender to puree the mix after it has cooked on top of the stove for a while and looks like it has thickened so that the texture is smooth. Then, it just continues cooking until I like the way it looks. After filling sterilized glass jars (from little jelly jars that I collect all winter), I let the jars sit until everything is cool before closing them up and storing them in the back of the refrigerator. Letting them store for a while really adds to the flavor. The black Italian plums produce a lovely deep plum color. If these are not available, I look for the smallest and darkest plums I can find. Every batch I make might be just a little different–but I’ve never had any complaints from anyone who was gifted with one of the jars.