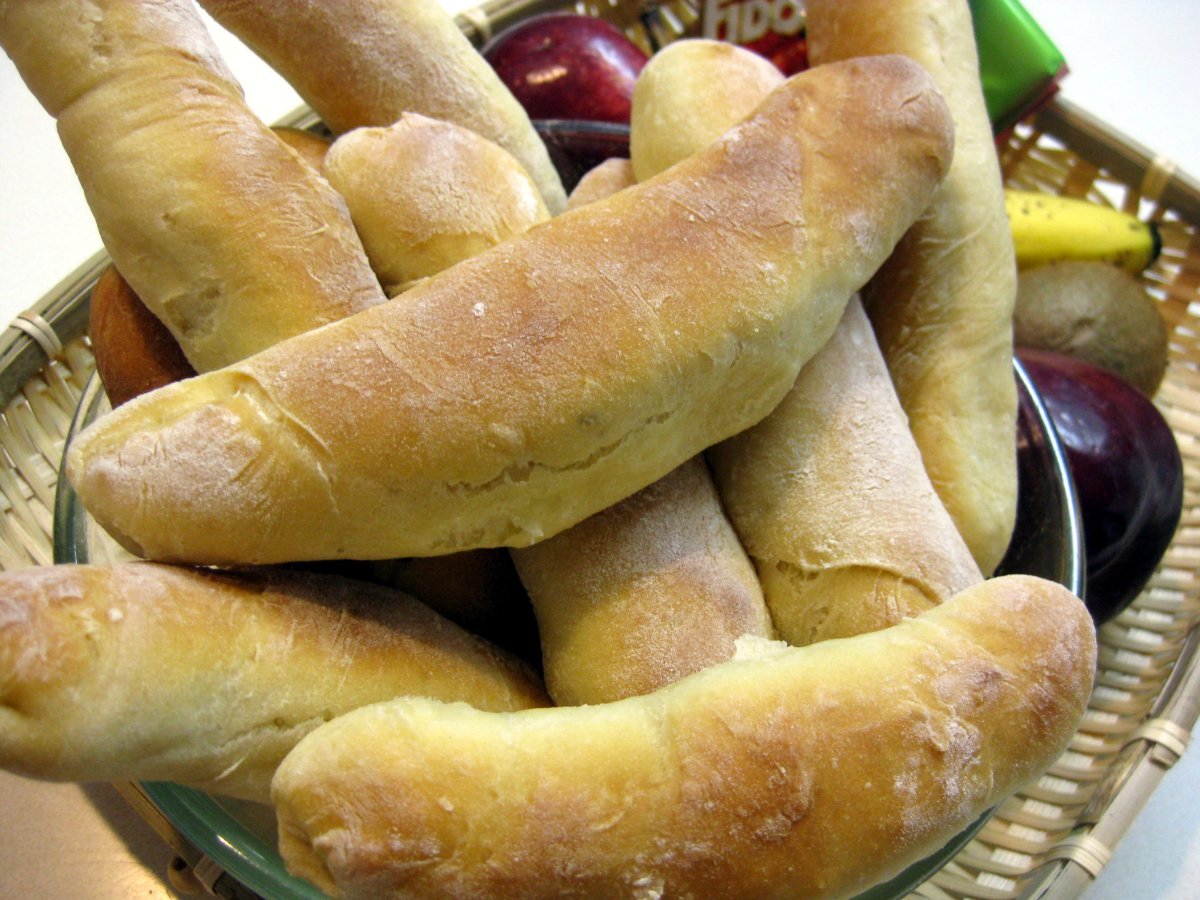
Slovak Bread Rolls (Rožky)
Ingredients for 8 rolls: 2 cups flour (225g), 1 cup milk (1/4L), 4 tbsp oil (60g), 1 tbsp sugar and 0.5 tbsp of salt, half a packet of yeast
Prep time: only about 20 minutes of actual work, two hours to let the dough rise, 20 minutes for baking
If you have visited Slovakia, you surely came across little slightly-curved mini baguettes called rožky. These baked bread rolls are a HUGE part of Slovak cuisine. I have no statistics to back this up, but I suspect Slovaks get at least half of their bread in the form of rožky (plural of rožok). In this recipe, I show you how you too can bake them at home. The recipe is based on an article on SME.sk, titled “Bake your own bread rolls, everyone can do it!”. Very true, indeed. Baking these bread rolls is really easy, and you don’t need any fancy bread machine.

Here is all you’ll need: flour, milk, oil, yeast, salt and sugar.


Combine all the ingredients in a container. Knead the dough by hand, or with a food processor with attached dough hooks. I have this handy mixer, so I used that a bit. But I don’t know if it was really easier on my hands. The hand-held gizmo produced quite a bit of torque which my wrist had to compensate form. So, if you are planning on doing much baking and cooking, you should get a stationary dough mixer, like the one shown in the video on the SME recipe page. The dough is done when it becomes smooth and elastic.


Let the dough rise, covered, for about 2 hours, until it doubles in size. I placed it in a warm oven; this worked great. Form the dough into a loaf and cut it in half.


Take each half and roll it out into a circle about 4mm thick. Make sure to flip the dough while rolling to get it smooth on both sides. Cut the circle into four sections. You can use a knife, but if you can find them, get one of these dough cutters. They work great! Now, let’s make rožky using the following four-step process. First, grab the triangle by the “ears” and stretch them out a bit. Fold the ears over. Second, tuck the long end over and roll up. Third, continue rolling with the palm of one or both hands. Fourth, there really isn’t a fourth step. Just finish rolling and place the tube onto a greased baking pan, the tail piece down.


Let them sit in the baking pan for about 20 minutes, so they rise again. I gave the rolls a little bend too, to make them look more like rožky you would find in a bakery shop. In the mean time, preheat the oven to 375F. Bake in the middle for about 20 minutes, until they turn golden brown. Ah, there is nothing like home-baked bread! Slightly crunchy on the outside, yet fluffy on the inside.
Next make some Parisian salad to go with them.
If you compare my rožky with those you will find in Slovakia, you will see that mine are much more twisty-looking. I am not sure why this is – and since this was my first time ever trying this method, I have not yet had a chance to experiment. The issue is that the individual layers should have fused together. Since they didn’t, I suspect my dough was tad too stiff. I wasn’t very precise with the measurements, so perhaps I had just a bit too much flour, or slightly too little liquid. I will report any findings – I will definitely be baking these again. And in the mean time, feel free to share your experiences by leaving a comment.
Update May 11th, 2010
I figured I give rožky another try, and boy, did this second batch turn out great! Although still not as pretty as you would find in a bakery, the taste was amazing! Lightly crunchy on the outside and fluffily soft on the inside.
The main thing I did different this time is that I let the tubes rise an extra time, about an hour, before baking. You can see how they doubled in the photos below. I also let the dough rise overnight in a fridge, but I don’t think this made any difference. Turns out, you can make the dough the night before, let it sit overnight in the fridge, and in the morning have dough ready for baking.


Here you can see how much the dough increases in size.

I baked them for about 15 minutes at 375F. Although you can’t tell from the photo, these rolls are about twice the size of the ones from the first batch. The baking sheet is much larger.
One great thing to do with these rolls is to top them with butter and jam and make a quick mid-afternoon snack.
Update January 16th, 2011
And one more update. This time they are looking much more like the way they are supposed to. It’s partly because I let the dough rise for over a day, not on purpose but because of various social commitments that got in the way of baking. These were nice and fluffy. By the way, If you have to let the dough rise for a long time like this, you can sprinkle flour over the top to keep it from drying up, and also place it in the fridge to slow down the yeast activity and to prevent the dough from going sour.
Thanks for this recipe…. I was just looking for an easy one. My mother would brush hers with egg white and sprinkle coarse salt on it. Mmmmm.
Thanks 😀
this was tasty :3
Well tried and have to say these rolls were awesome… very tasty and very near the ones I used to have at “home”…
thank you so much for this recipe. i live in england and i greatly miss the slovakian bread. i am going to try and bake this now. 😉
well i have tried to make rozky, but i think i was a bit impatient, because they didnt rise enough and are a bit small. but still taste great.;) maybe next time
Yeah, that is really important – as I am finding out myself. The other thing is knowing just how much liquid to give the flour. This is one of those things that you just need to know from practice, which is probably why my grandma’s baked goodies taste so much better than mine. But, more liquid seems to always work better than less.
Just baked my first batch! I brushed them with salted butter after they came out of the oven. Wonderful! Thanks!
Hallo, I come from Kosice but nine years we live in Switzerland. And slowak rozky we are missing too much. So thank you for a recipe, I try to bake them
Sorry for my english 🙂
Janka
Dakujem Janka, daj potom vediet ako dopadli. A kludne nechaj comment aj v Slovencine. Ked ich budes robit, sprav to cesto aby bolo take jemne, ako paperie, a nechaj ich este 15 minut nakysnut po tom co ich zrolujes a das do rury.
Lubos, I just finished baking a batch. This worked out great! Dakujem!
Nie je tomu davno,co som nasla tvoju stranku a som velmi rada.Tiez mam uz dospele deti,ktorym som tu v Amerike varievala jedla mojej mamy.Ked pridu na navstevu,tak to je slovenska kuchyna.Ak chcu v buducnosti vediet,ako chutia rozky,tak nech sa trochu potrapia.Vyborne.Ja si pamatam,ked my sme doma mali pec a piekli chlieb len raz do mesiaca.Styri velke bochne.Najviac sme sa tesili na tie ranajky,ked pred odchodom do skoly sme mali na stole tzv.poplamuchy,velkosti pizza,a zapijali sipkovym cajom.Ono vela zalezi,kde sa to pecie a preto to ma inu chut.Nasa pec bola vykurovana drevom a ta vona sa v trube neda nahradit.Ale ak sa mi zvysi cas sa stym pohrat,dam ti vediet.Keep good work.
Zabudla som podotknut,ze tie poplamuchy boli potrene cesnakom a omastene.Najradsej sme mali kacaciu alebo husaciu mast.Mozno,ze ten recept uz niekde mas,ale som ho este nenasla.Nemala som tolko casu.Raz mozno budeme nuteni sami si piect nas chlieb kazdodenny.
I put the dough in a 9inx5in baking pan and baked it and it came out pretty good. I am going to try again to make the rolls.
Thank you for the wonderful recipe, but I found that my dough didn’t rise as much as is should have, so the second time i tried it i used warm milk and it worked great.
Hi Christina, also use less dough. I found that what works best is for the dough to be quite runny when you let it rise, kind of like honey. You then work in more flour at the end, as you go about forming the rolls. It took me few times to get this one right 🙂
Just wanted to let you know that I made your recipe for Rozky and it turned out great! I let mine rise for about two hours, then punched it down. Let it rise again for about an hour, then made them into the shape and let them rise for another hour. They were wonderful! My family went nuts for them. My wife came home from work, opened the door and just yelled at how great the house smelled…home made chicken soup along with home made noodles and Rozky! The President of the United States doesn’t eat this good!
Tim
prave som dopiekla rozky, su velmi chutne, srdecna vdaka za lahky recept. Moje cesto narastlo za 45 min, pouzila som polovicu balicka cerstveho drozdia kupeneho v polskom obchode…
Lubosi, akorat jsem objevila tvoji stranku a jsem hooked 🙂 Muj deda byl pekar a tatinek taky pracoval v pekarne,takze jsem byla na brigadach kde jsem vetsinou pomahalu u rohliku 🙂 Jsem z jiznich Cech …Manzel (American) miluje rohliky a tak ho prekvapim a pokusim se je upect 🙂 Chtela jsem se zeptat odkud mas pecici plechy…vypadaji jaky to poctivy Cesky/Slovensky a ne ty ubohe co prodavaji tady v Targetu…Moje rodice maji plechy 35 let od svatby a porad slouzi…tady je tezko pekace/pecici plechy sehnat. Dekuji za radu a hodne zdaru! Jana
Cauko Janka, to nie, ten plech je tu z Bed Bath & Beyond. Je to klasicky 11x7x1.5 inches plech. 🙂
Recept na obľúbené sladké rožky “lúpačky”.
Domáca pekárnička nie je potrebná.
http://www.mimibazar.sk/recept.php?id=32177
Bake fresh rolls.
http://domacnost.sme.sk/c/4256811/upecte-si-cerstve-rozky-zvladne-to-kazdy.html
Hi this is Kanaha from India, Thanks so much for your recipe. I truly liked it. You have mentioned “half a packet of yeast” in the ingredients part. May I know the exact measurement?
Baking these smell very much like Slovakia.. Oh how I miss that country! Any recipes for zemla? 🙂
Can it be?
http://varecha.pravda.sk/recepty/rozky-a-zemle-fotorecept/24585-recept.html
Ahoj Lubosi, strasne moc dekuji za recept. Dala jsem se do peceni rozku jeste v ten samy den. Ale nevim jestli jsem neco udelala spatne. Testo bylo hodne ridke, tak jsem pridala mouky, ale i to valeni testa byla taky drina, porad se lepilo jak bylo porad jeste ridke, ale bala jsem se pridat vic mouky aby mi nakynulo jak ma. Nemas nejakou radu?
Mam radu.Tento recept je velmi,velmi dobry.Treba mat kvalitnu muku.Moje rozky vecer nie su na struhanku.
Slovenske babky nam odovzdali velky dar.
Hi, Lubos! I’ve been wanting to try your rožky, and finally got the chance to do so today! They turned out very well – golden-brown and crispy outside, tender and fluffy inside. They also rose very nicely as I let them sit about half an hour before baking. One thing I noticed is that the amount of oil seemed quite high. I looked at the original web page and I can’t be totally sure but I think the recipe there is for two of your batches of rožky, but your page uses the same amount (60g) of oil. I could be wrong, but I think your page should cut the oil in half. Let me know! In any case, absolutely delicious results and I am very glad I tried these – I’ll be making them again with every Sovak meal that we prepare. I took photos and will be posting at my website, http://foodsoftheworld.activeboards.net. Thank you for sharing this, my friend!
Whoops – Slovak, not Sovak….
Well, Lubos, I take that back! I took a second, closer look today, and it appears that your numbers are indeed just about right. My apologies! I think the problem came when I made a double batch. Either way, great bread rolls, and I will be making them often!
Well, after watching teh video now, I am not so sure. It looks to me like the oil on your page is the same amount as on the source pag, but everything else on your page is cut in half I think your page should show 30g of fat instead of 60, but I could be wrong!
Ron,
I watched video too. I think you are right. The recipe is for 16 rolls. I am going to try it over the weekend I’ll let you know.
Hi, Dagmar – I am going to be making these again this weekend as well, for a klobása a kapusta polievka that should really be good! I will cut the oil in half, and see what the results are – but to tell the truth, they should be great either way. I think the only difference is that some extra flour will have to be added. Thanks again Lubos for sharing these rožky with us!
Hi Ron,
so I made 1st batch yesterday. Didn’t turned out well. Per my daughter rozky were like drum sticks.
So I decided to give it another chance and made 2nd batch. I followed the video link for 500 g flour, 250 mil lukewarm milk, fresh yeast I put 42 g, 60 g oil, 2 teaspoons sugar, 1 teaspoon salt. I let the dough rise in fridge overnight. I baked them this morning and they turned out much better. But still I taste yeast and I think they are not salty enough. Next time I won’t let dough rise overnight and maybe put less fresh yeast.
Hi Dagmar, I am also finding out that an oven can make a big difference. I now live in an apartment with an electric oven, and the breads I make are not as good as the ones in the house where I used to live before. That place had a gas oven. Not sure if it’s due to gas vs. electric, but the breads just don’t rise as much as they used to. I have been experimenting with adding a tray with ice water to create extra steam. That seems to help a bit.
When it comes to crusty bread, I seem to have the best luck if I am able to bake it in a covered cast iron or some piece of cookware. for isntance, if I make a loaf of white bread, I form it into a round loaf, put it in the bottom of my greadsed/buttered/oiled Dutch oven, and then put the lid on for about 2/3 of the cooking time. The covered, heavy Dutch oven creates a “micro-climate” that seems to really help for the first part of baking, and then taking the lid during the second part allows it to finish. The bread comes out really nice with a toasty-brown, crusty crust. I am not sure if this idea can be transfered to rožky, due to their size and the lay-out on a baking sheet – and also the shorter baking time – but the spraying might be a good stubstitute. Hope this helps – Ron
I did it this morning, hmmm 😉 heaven!!! I am Slovak but I am living out of home for over a 4 years…..first Spain, now Canada….very tasty! Thanks for the recipe!
Wow! Great collection! The older generation in my family are mostly gone now. I’ve continued to prepare only a few Slovak favorites for my 87 year old dad. Now I have a small arsenal. Many thanks.
About ‘Bread’ recipe’s I noticed that some folks are having a little trouble with ‘rising’ times. I would suggest NOT altering the amounts called for in the recipe. The altitude of your location may affect rising and cooking times. As well as the ambient room temperature. Other non bakery recipe’s may be improved by using filtered or bottled water. In general…If you don’t care for the taste of your tap water….Why would you use it for cooking?
My Ancestors came to America more than 100 years ago (from Plaveč and Prešov). I have no ‘Slovak’ name for this easy recipe. But many have asked me for it.
Warm Buttered Egg Noodles with Cold Cottage Cheese and Fresh Dill.
Dice a small bunch of fresh dill (I use about 1/2 cup of loosely chopped dill).
In small pan melt 1/2 stick salted butter. then finely chop 2 to three cloves of fresh garlic or similar amount of chives. brown very lightly. remove from heat and keep for later.
In salted water boil 1 lb. of medium Egg Noodles (never Italian style pasta) Strain out water and place in large bowl. Add butter garlic mixture and fresh dill. Salt and Black Pepper to taste. Lightly toss. Add one quart of cold large curd cottage cheese. Mix quickly and serve.
Cottage cheese is a substitute for that hard to find Slovak “Farmers Cheese” or similar style goat cheese.
You give it a Slovak Name…Poznam len niekoliko slov po Slovensku.
Which kind of flour do you use for this? Just a plain flour or an actual bread flour?
You use plain flour. See video.
http://zena.sme.sk/c/4256811/upecte-si-cerstve-rozky-zvladne-to-kazdy.html
Hello.I came across this recipe on Pinterest. The recipe sounds like one my Gramma made wonderfully,but they were called Rholicky, I am not sure of the spelling.
Can you tell me if this recipe is for rholicky also?
Thank you
“rohliky” is just the Czech name for this
rohlicky (pronounced ‘rohlichky’ just means ‘little rohliky’. It’s just the diminutive form of the word.
I’ve already made these rohliky 4 times in 8 days 🙂 My husband loves them with homemade soup or with a casserole. I just enjoy them on their own, and find they have so much flavour, they don’t need any butter.
My Czech mother in law saves bacon grease and uses it to grease the pans, and in the dough. She sprinkles salt on top after rolling. It brings them to a whole new level! She cuts the dough in rectangles, splitting one end a bit and rolling each side down to start the Rulik crescent shape.